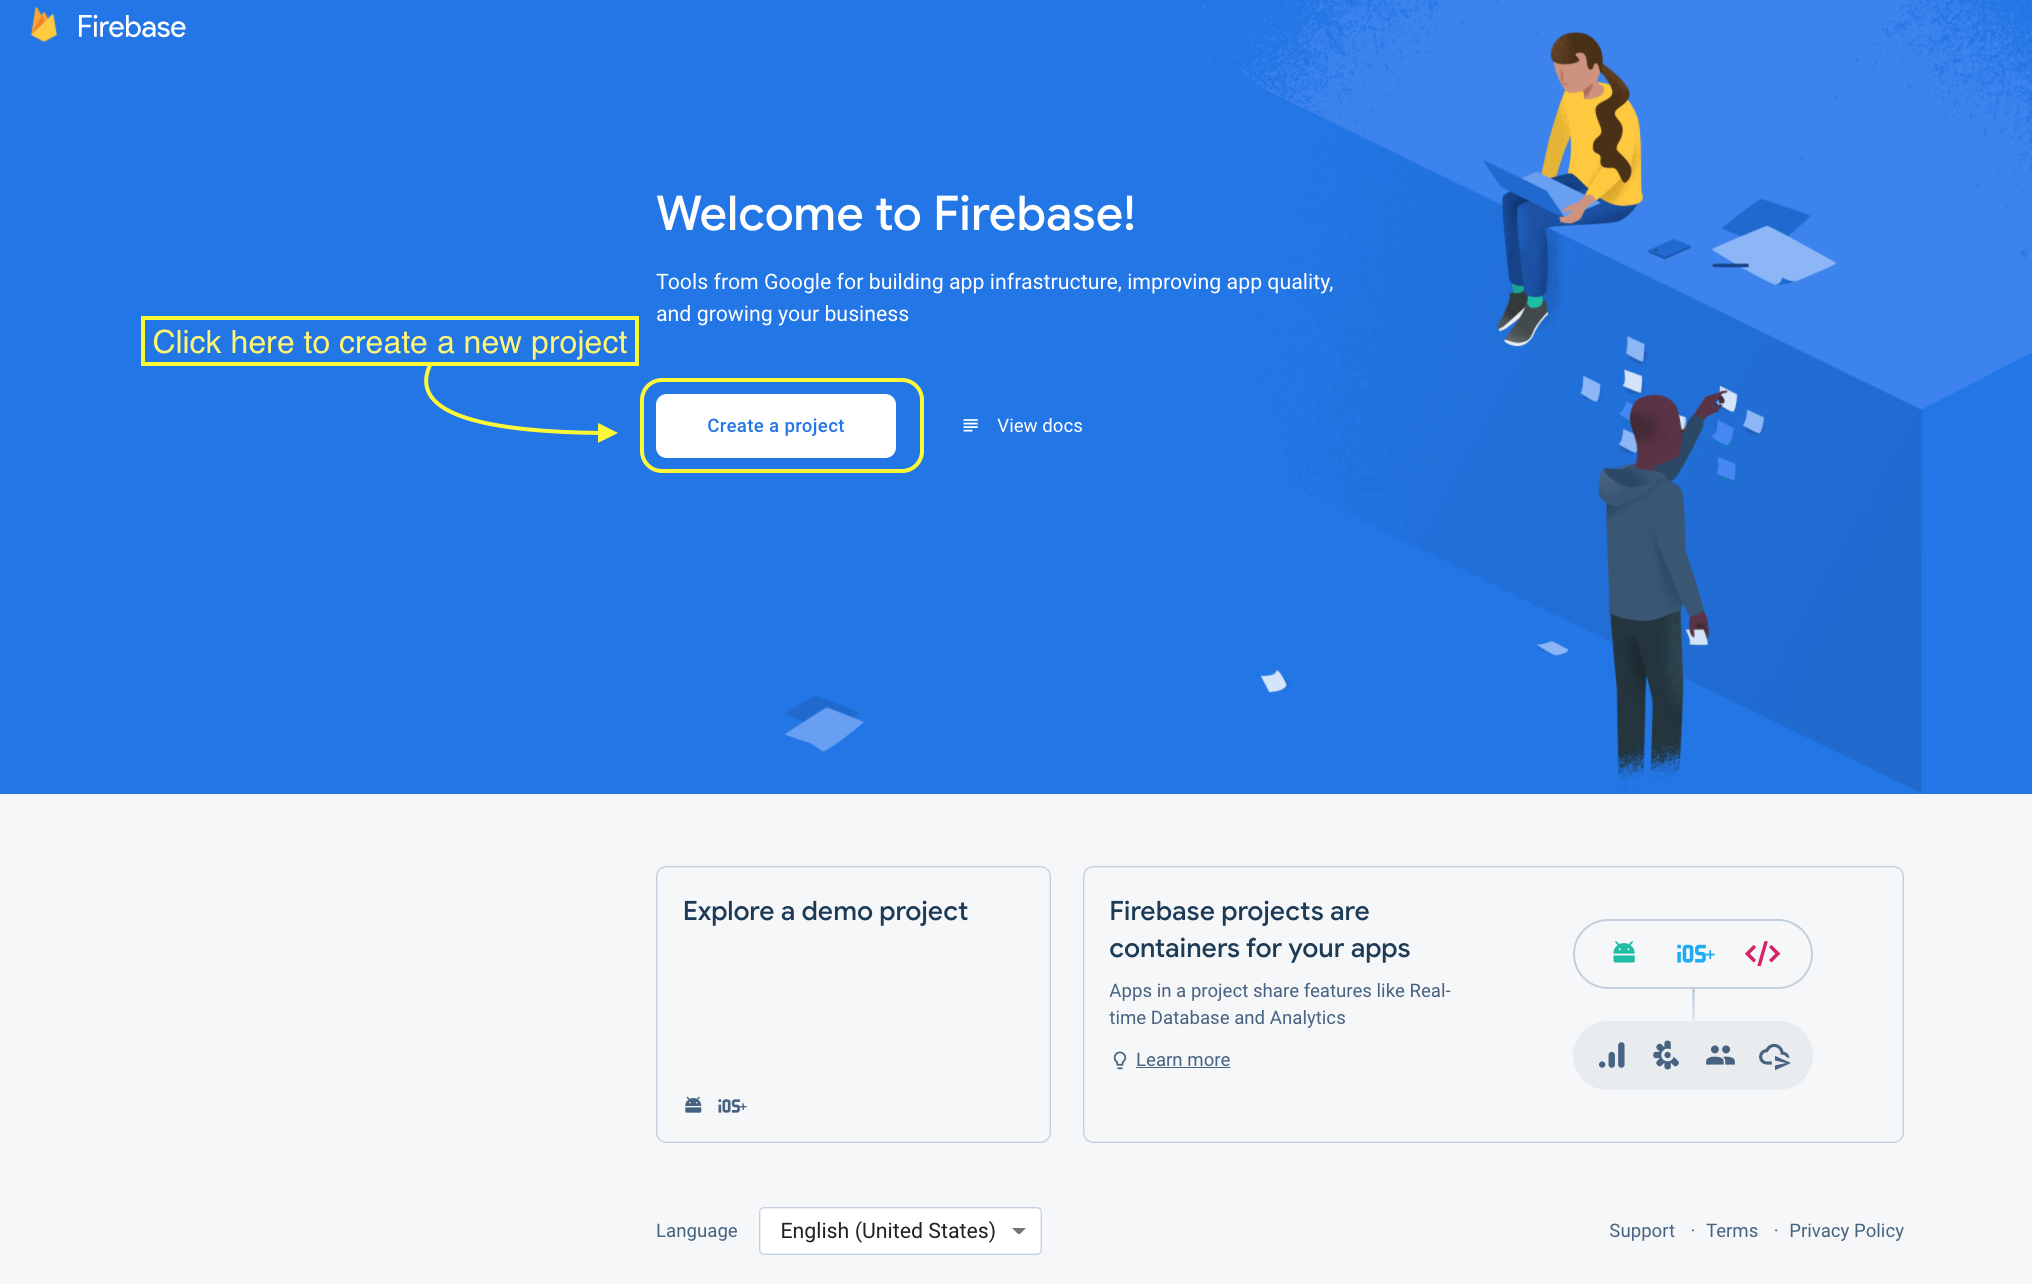
Step 1: Sign in to Firebase, then create your project.
- Click on Create a Project and follow the steps.
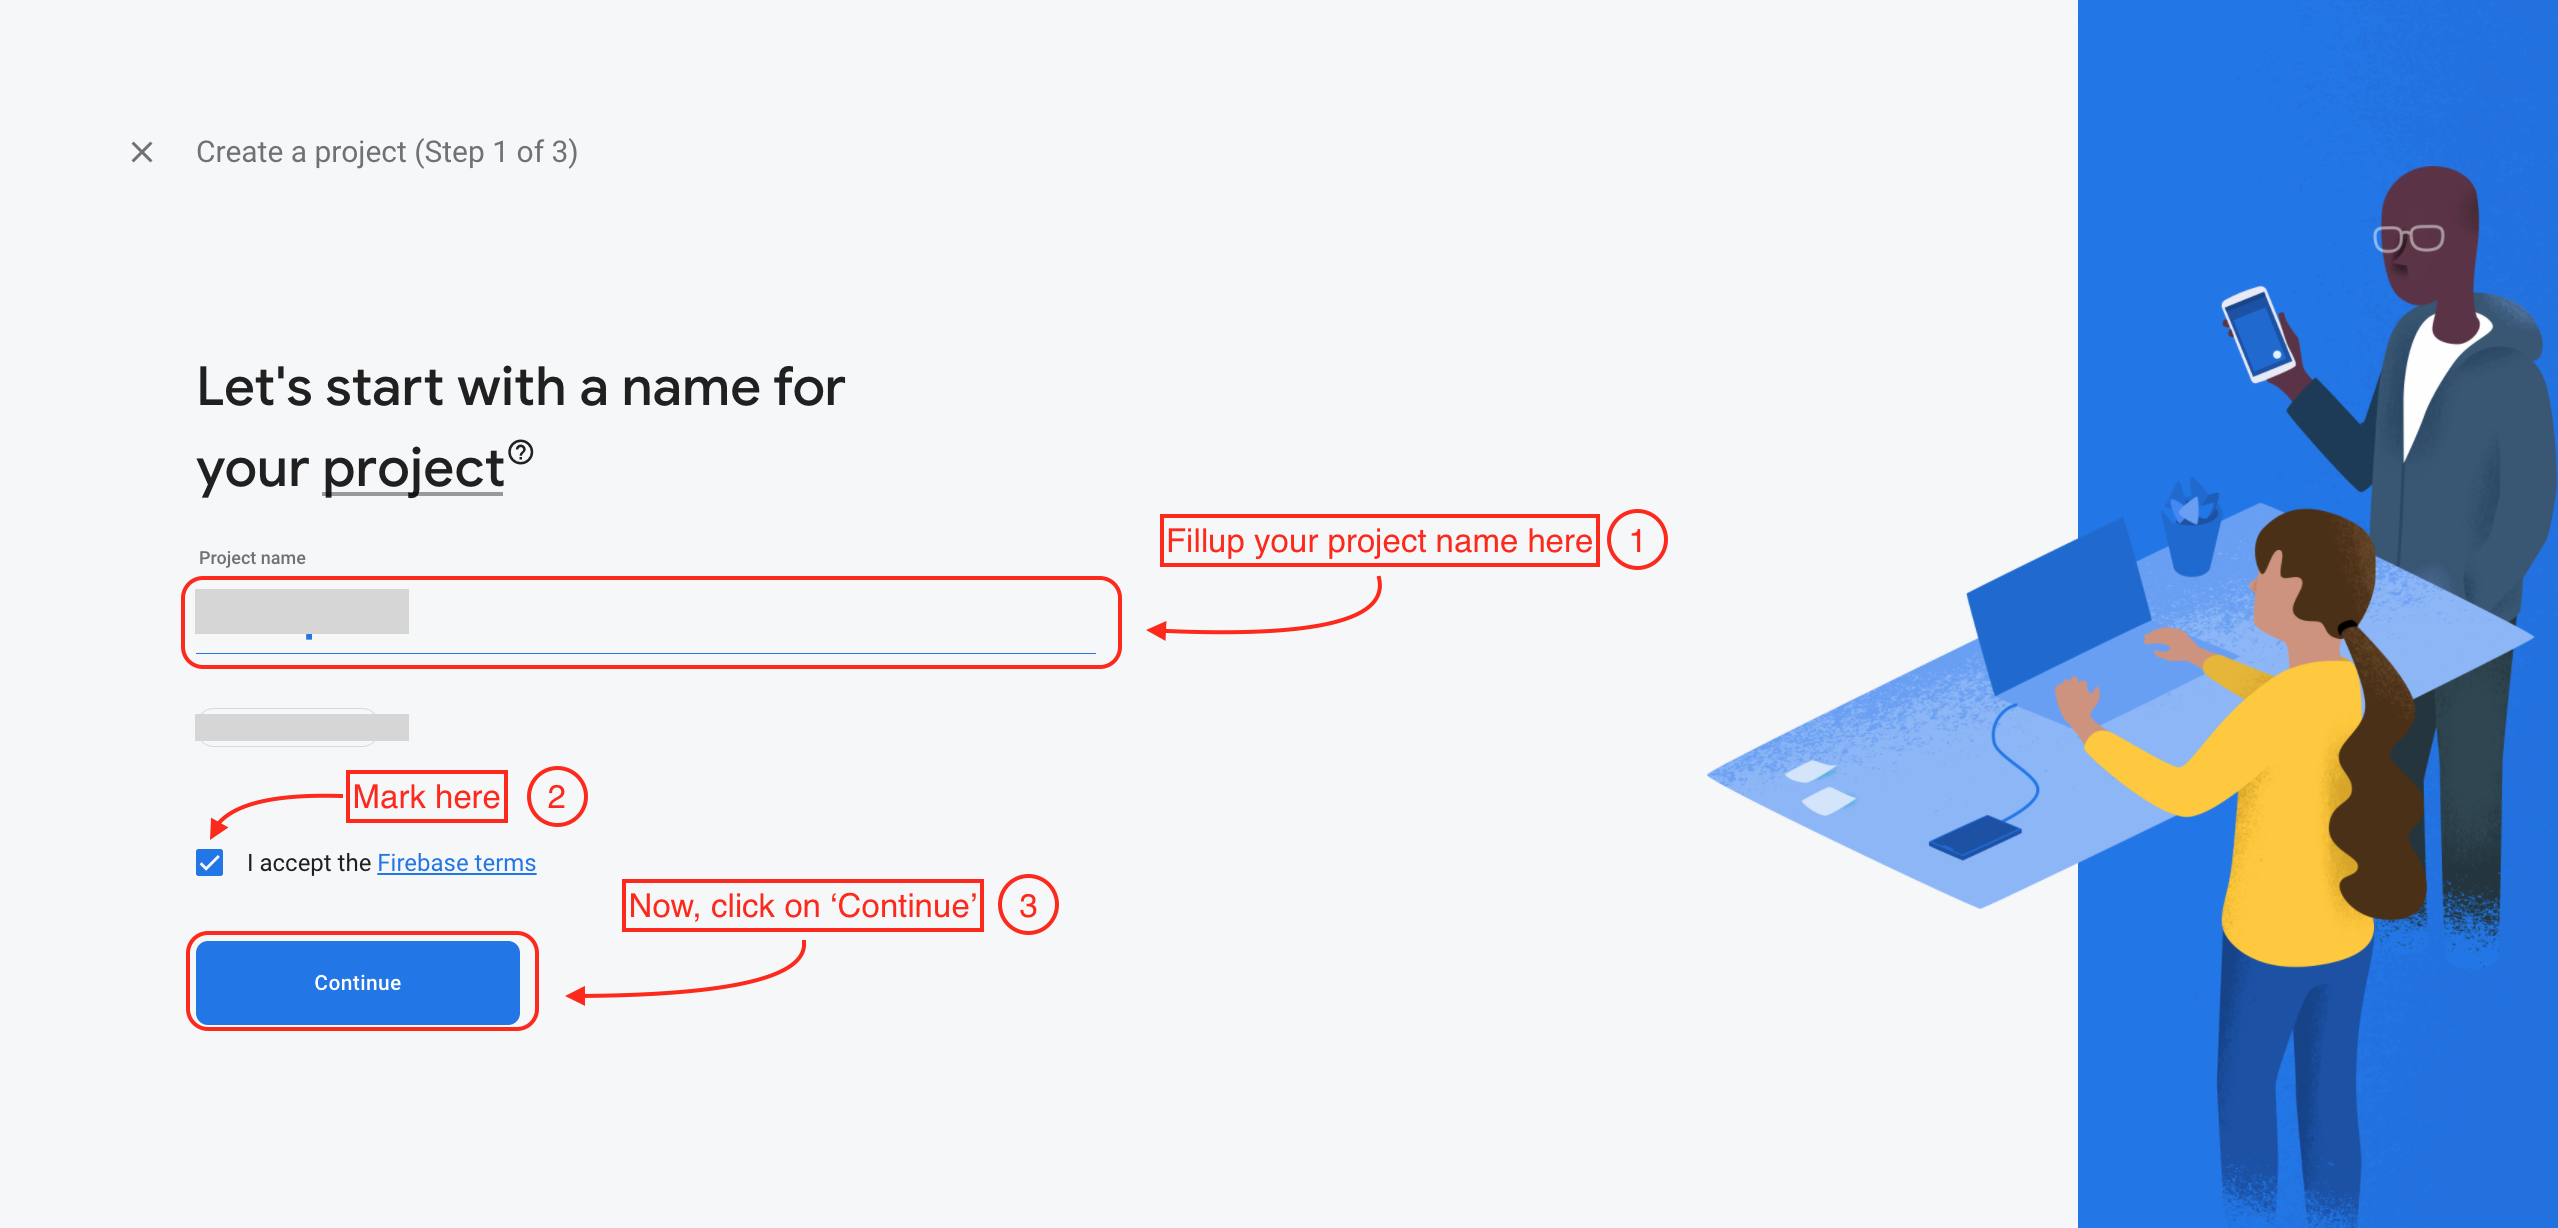
- Add a Project name for your project
- Check (√) the Firebase terms.
- Click Continue.
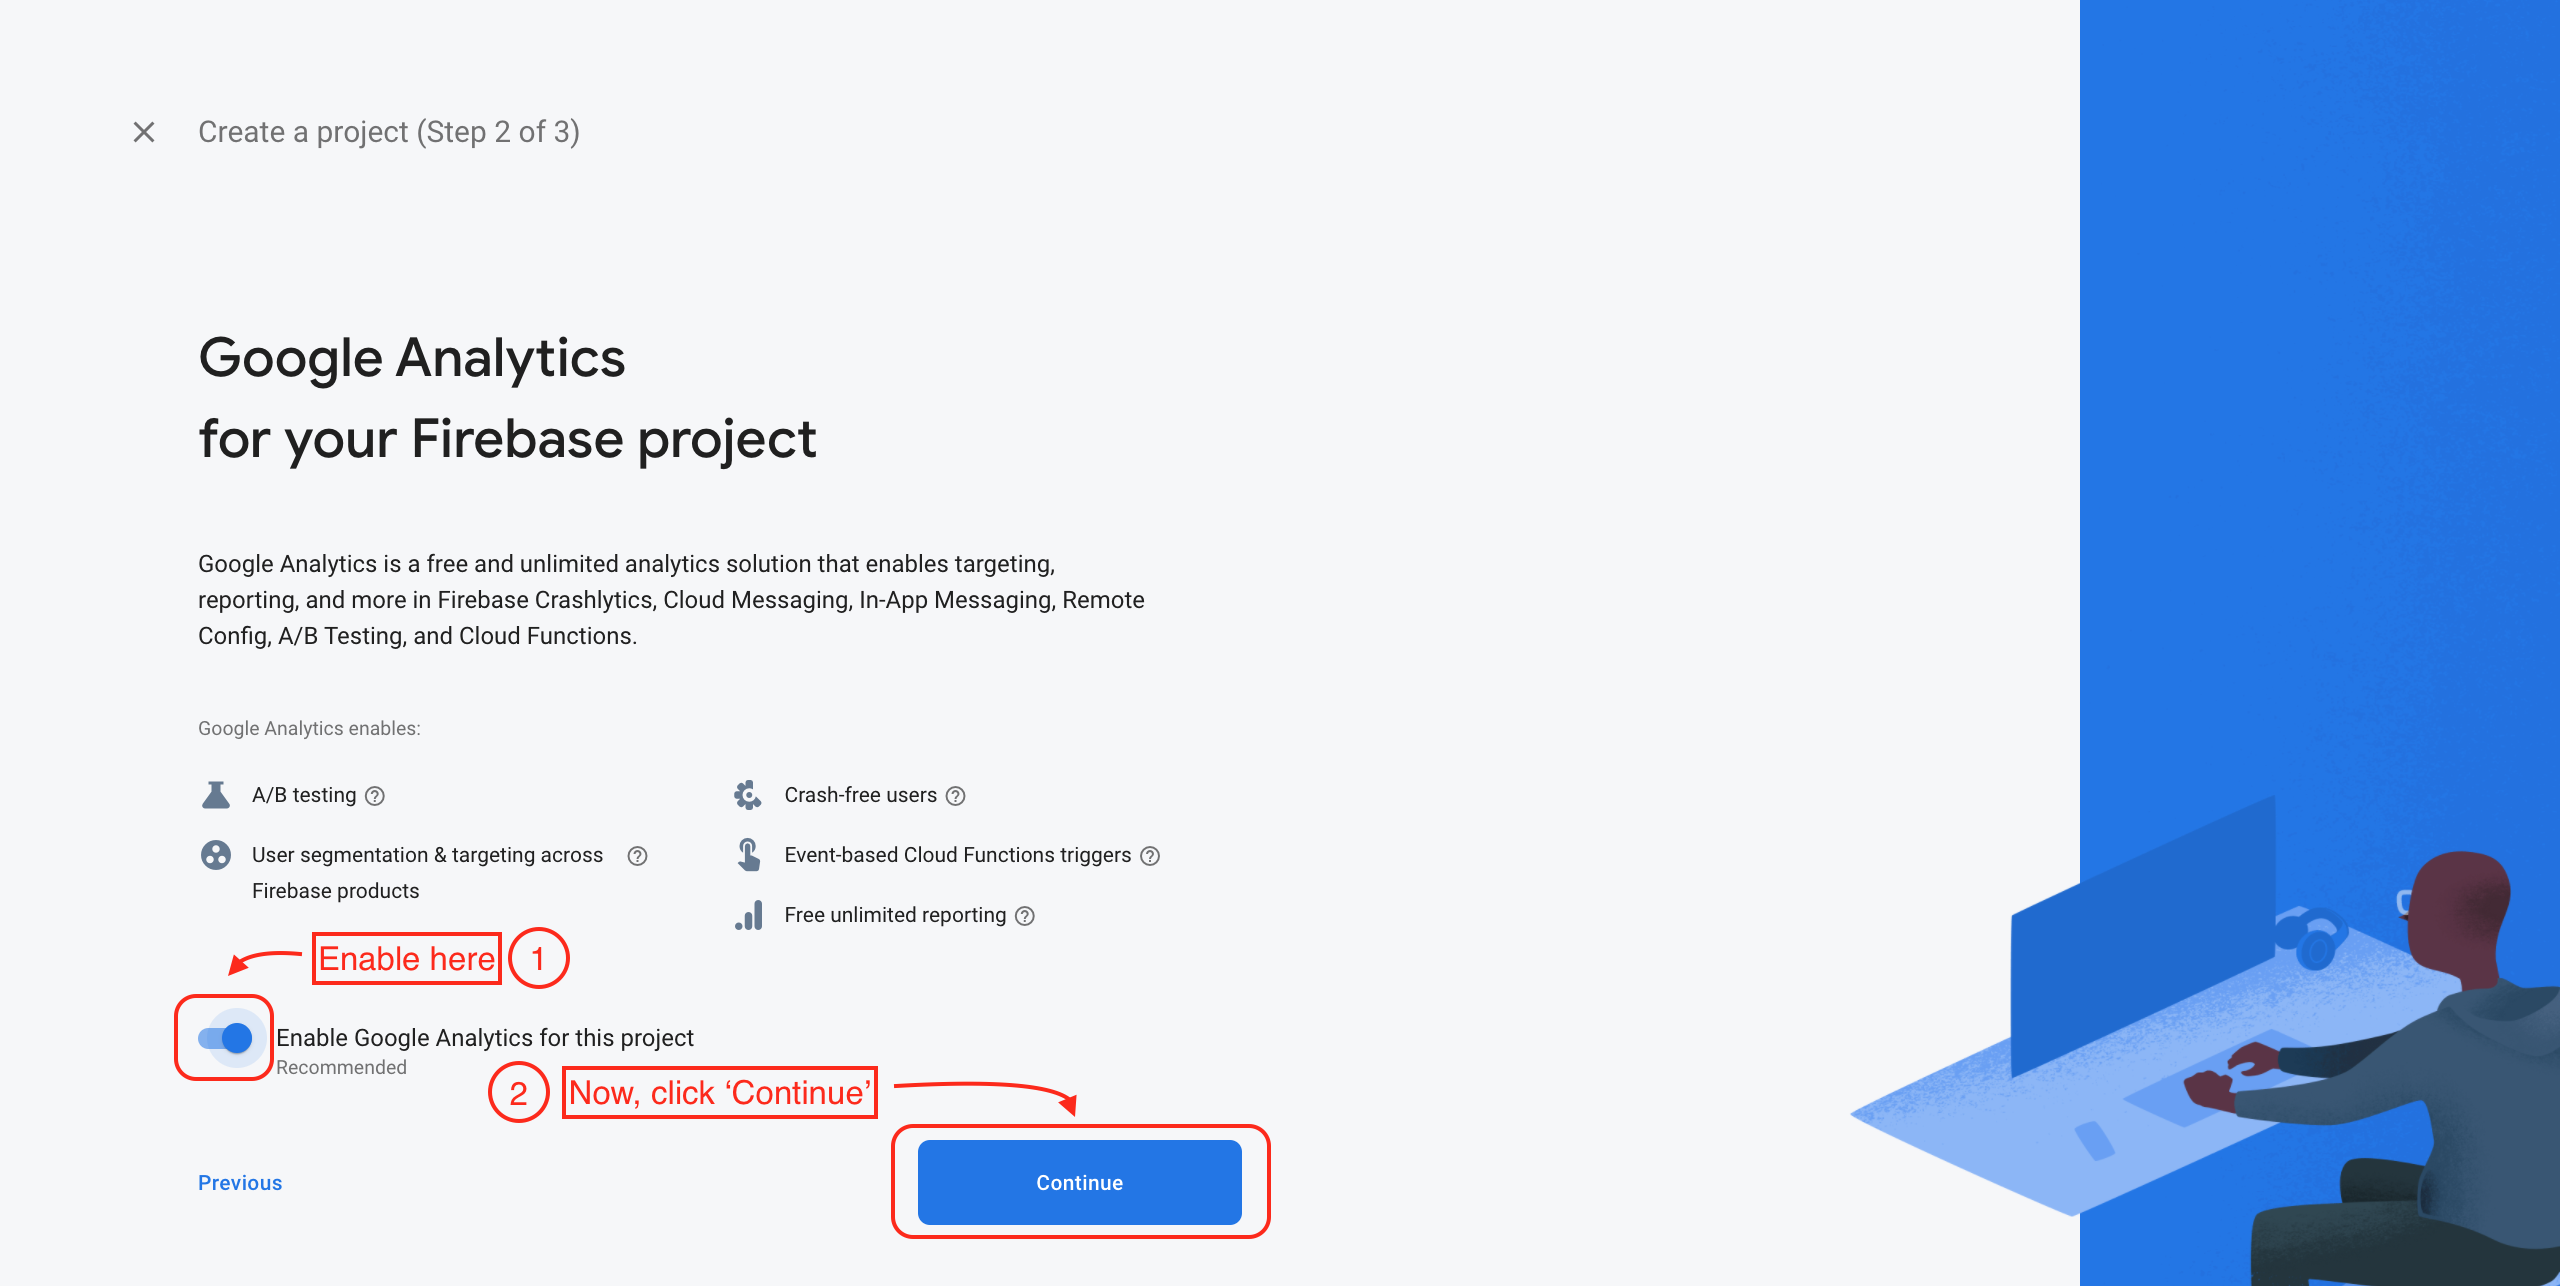
- Enable Google Analytics
- Click Continue.
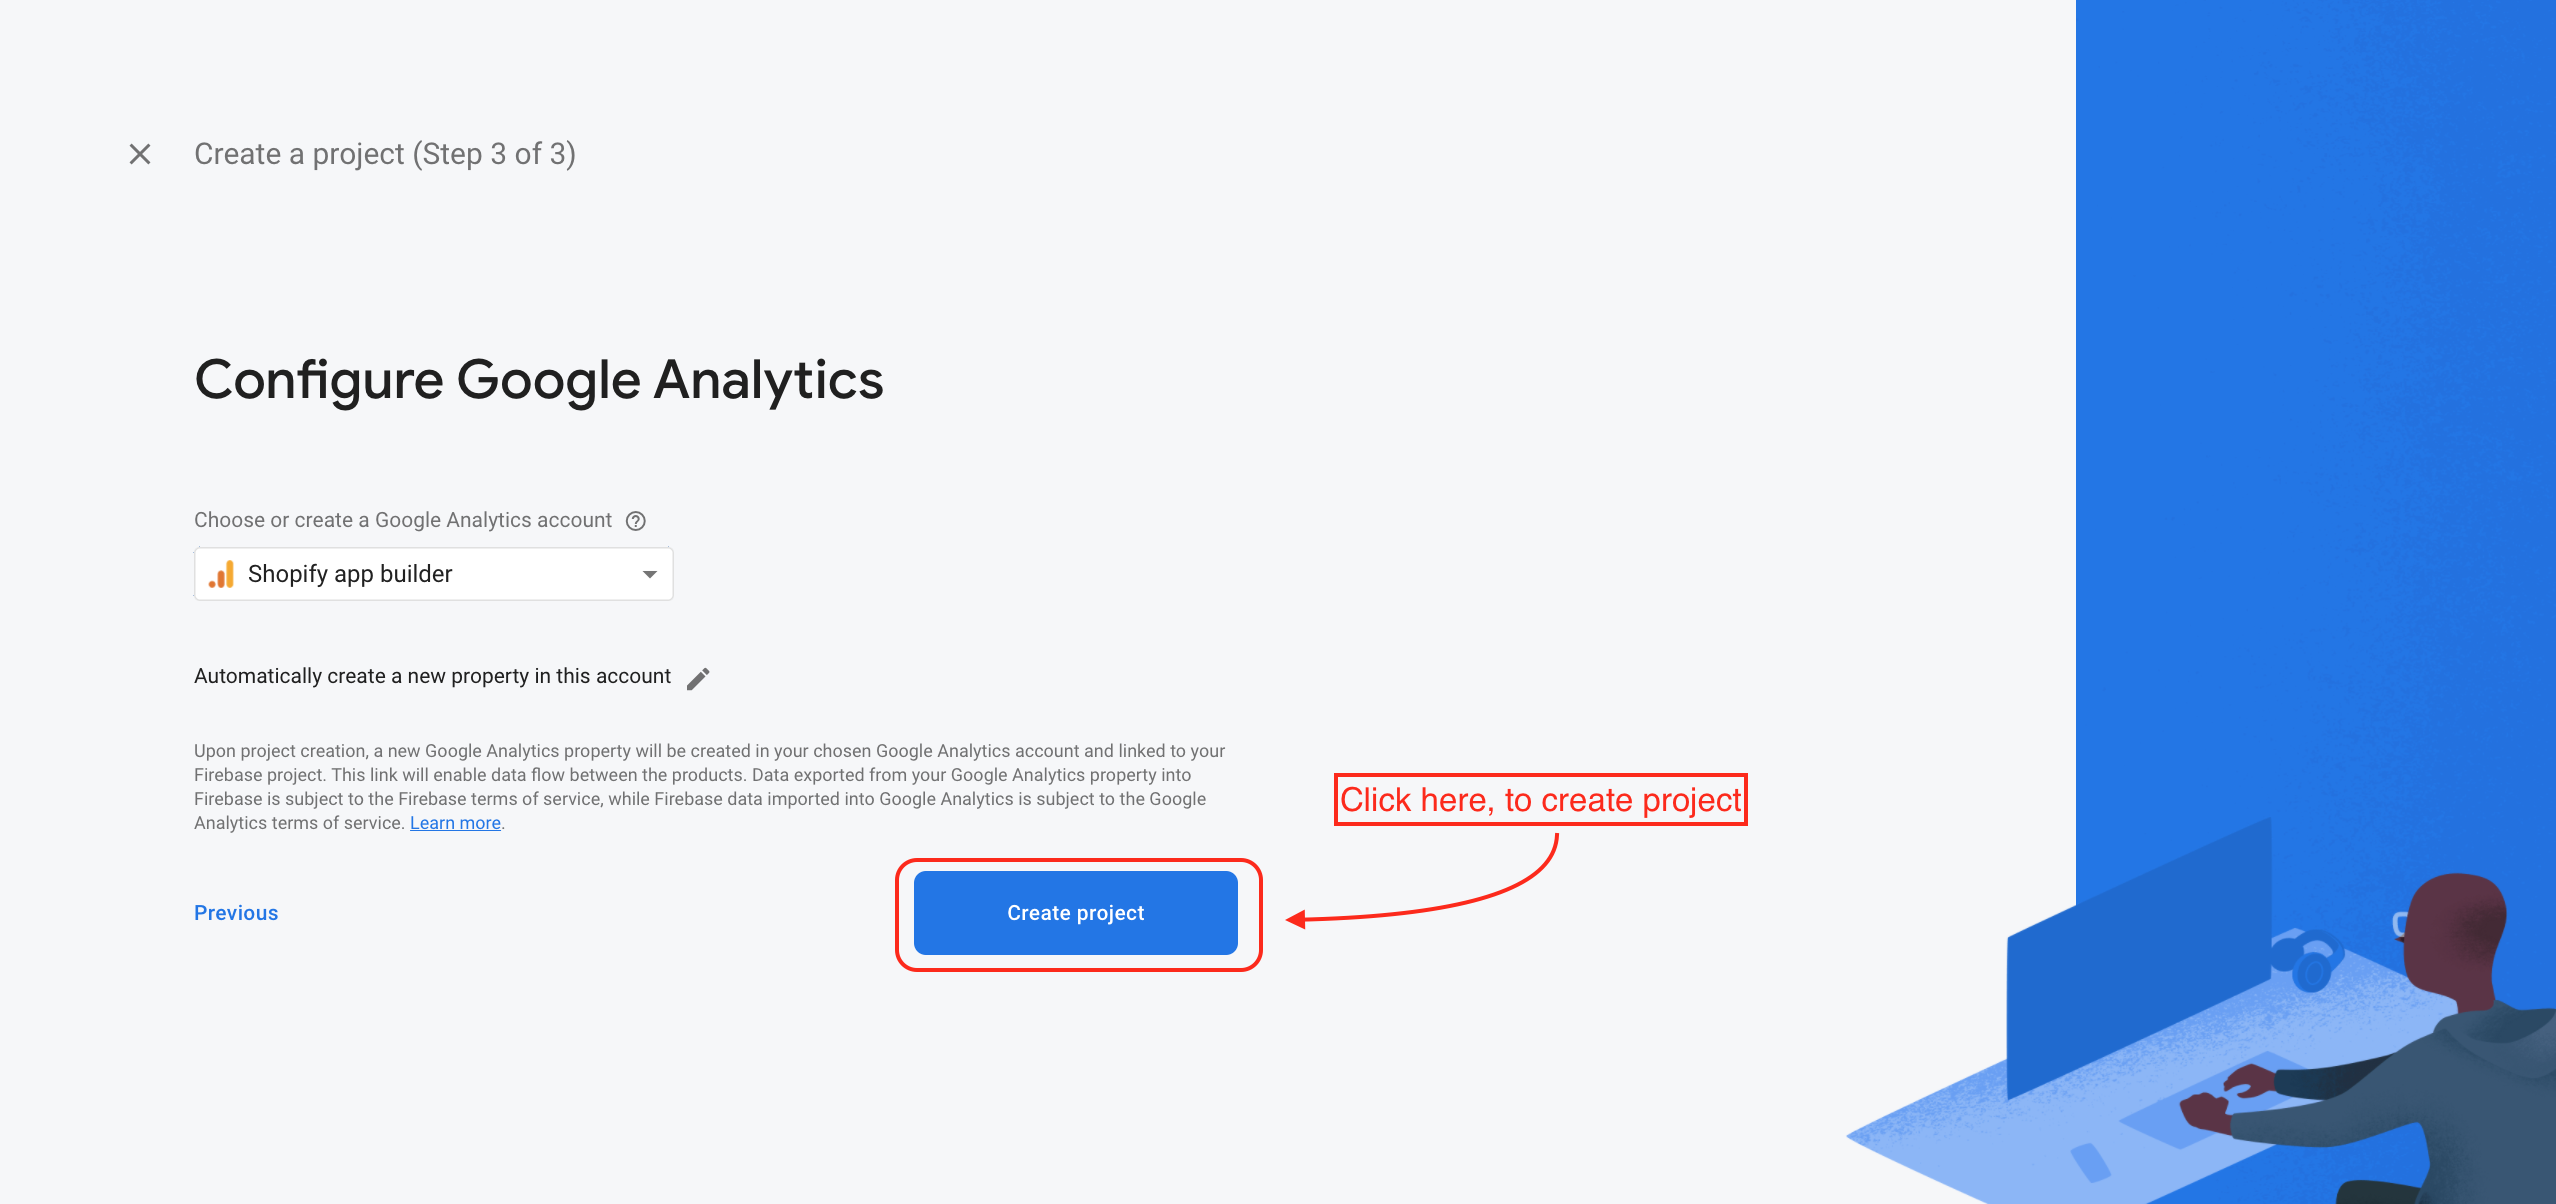
- Now, click Create Project.
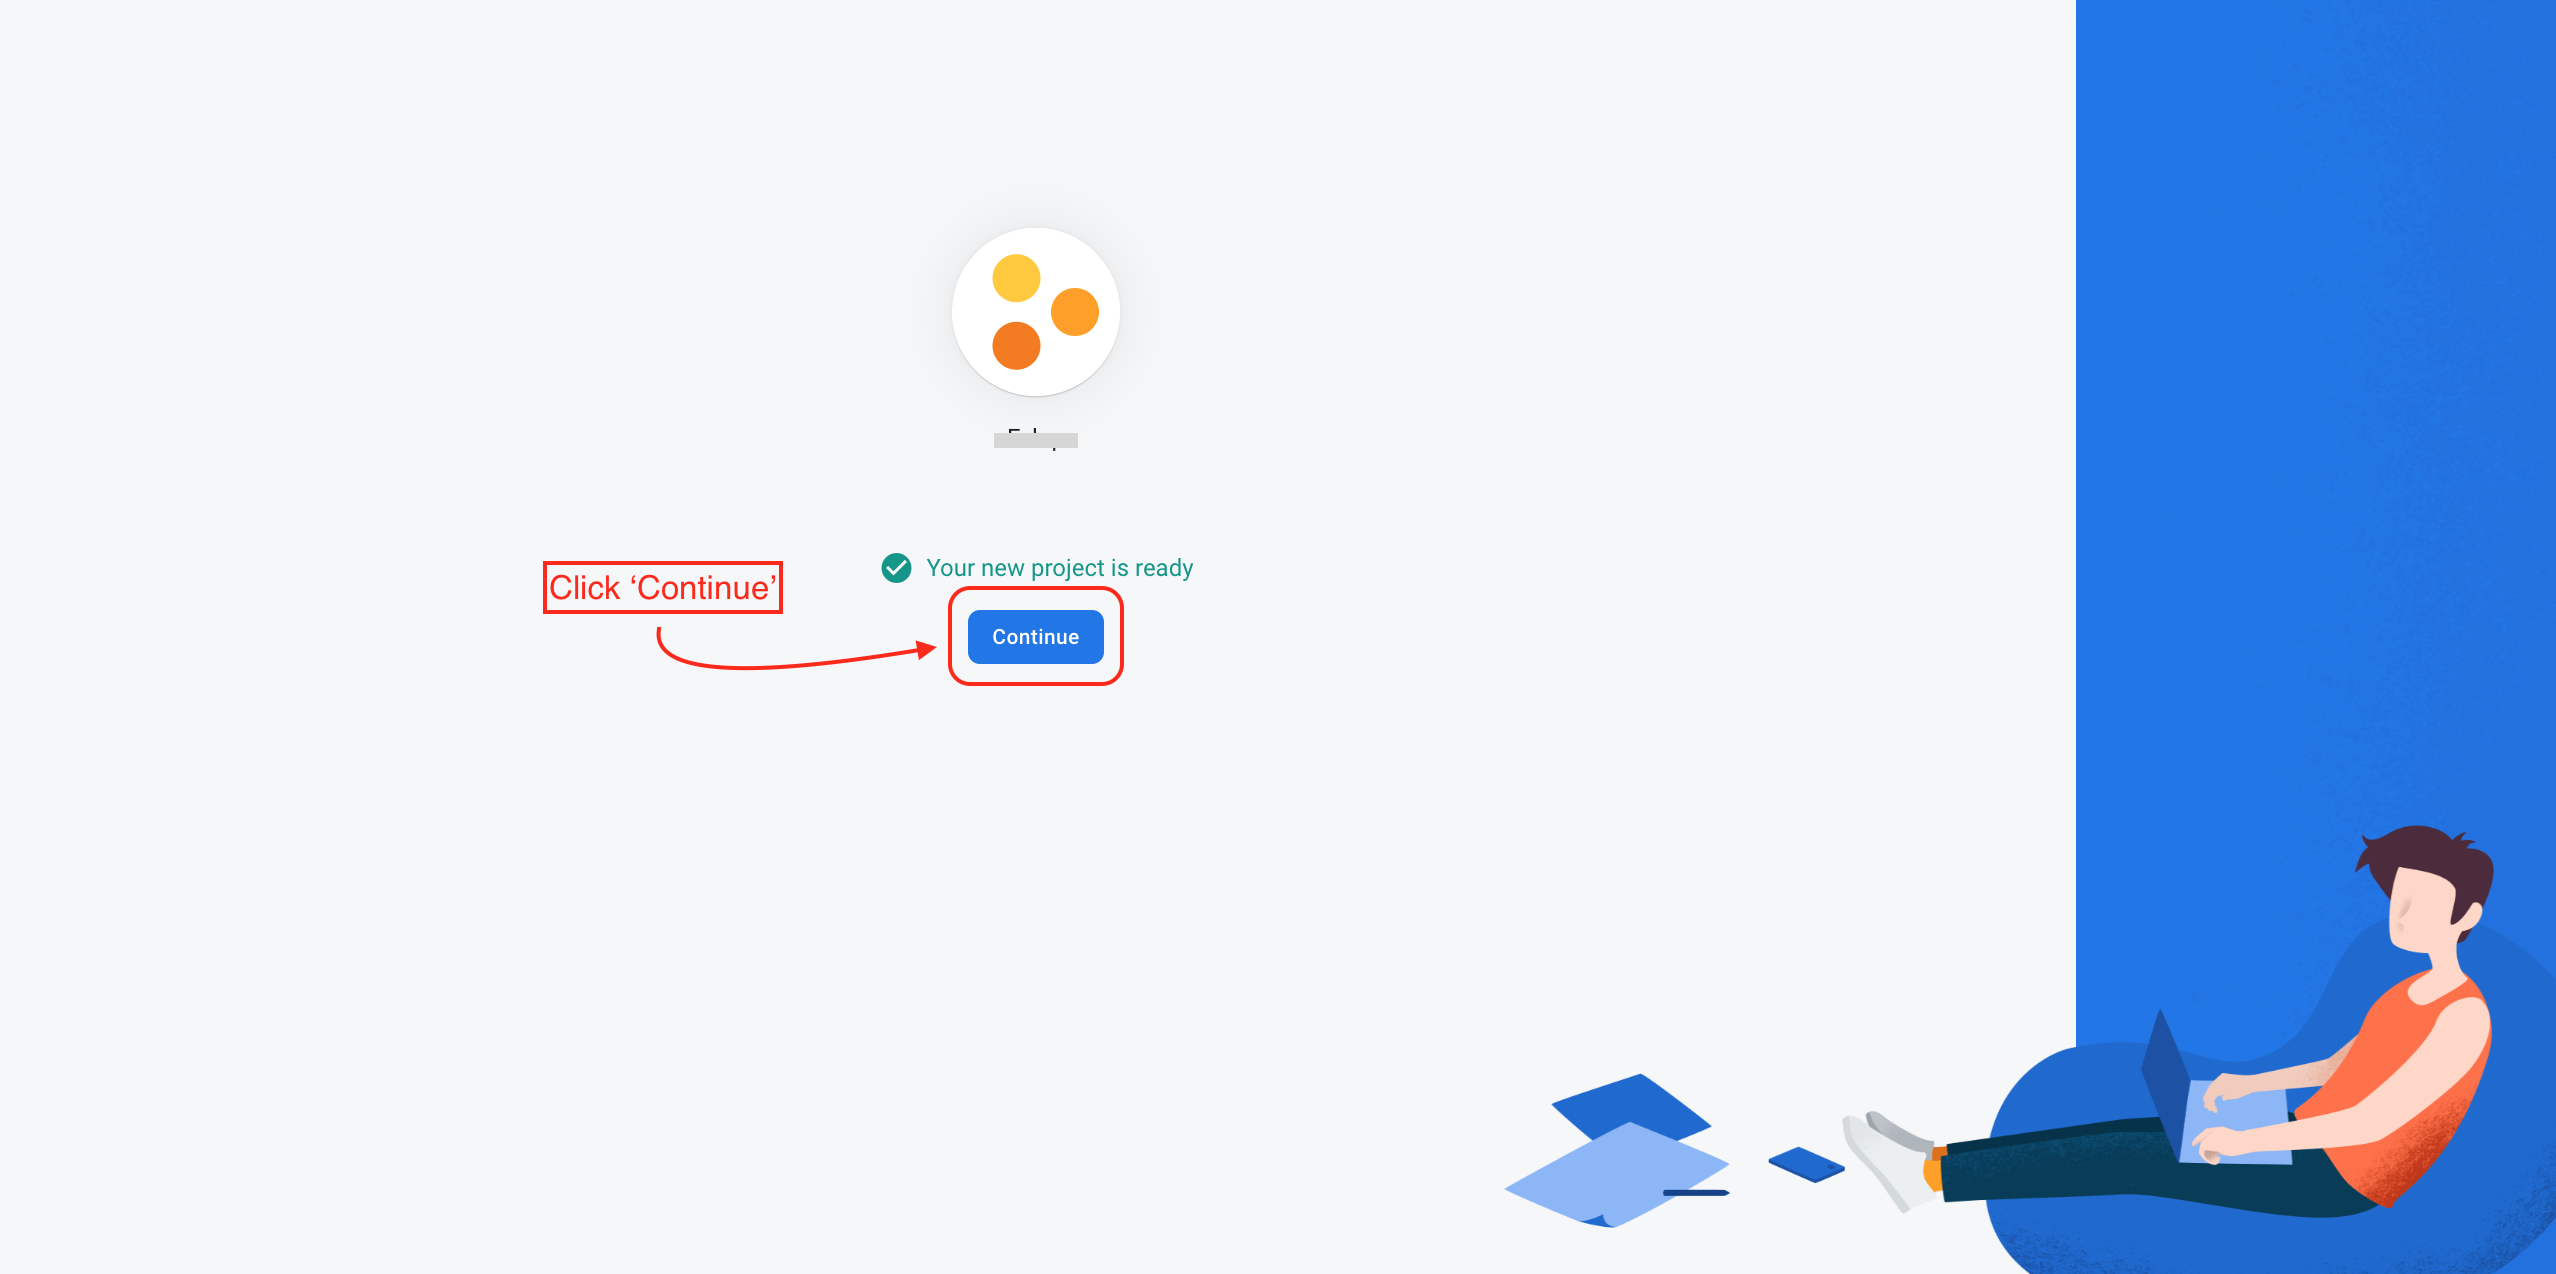
- Your project is created, Click Continue.
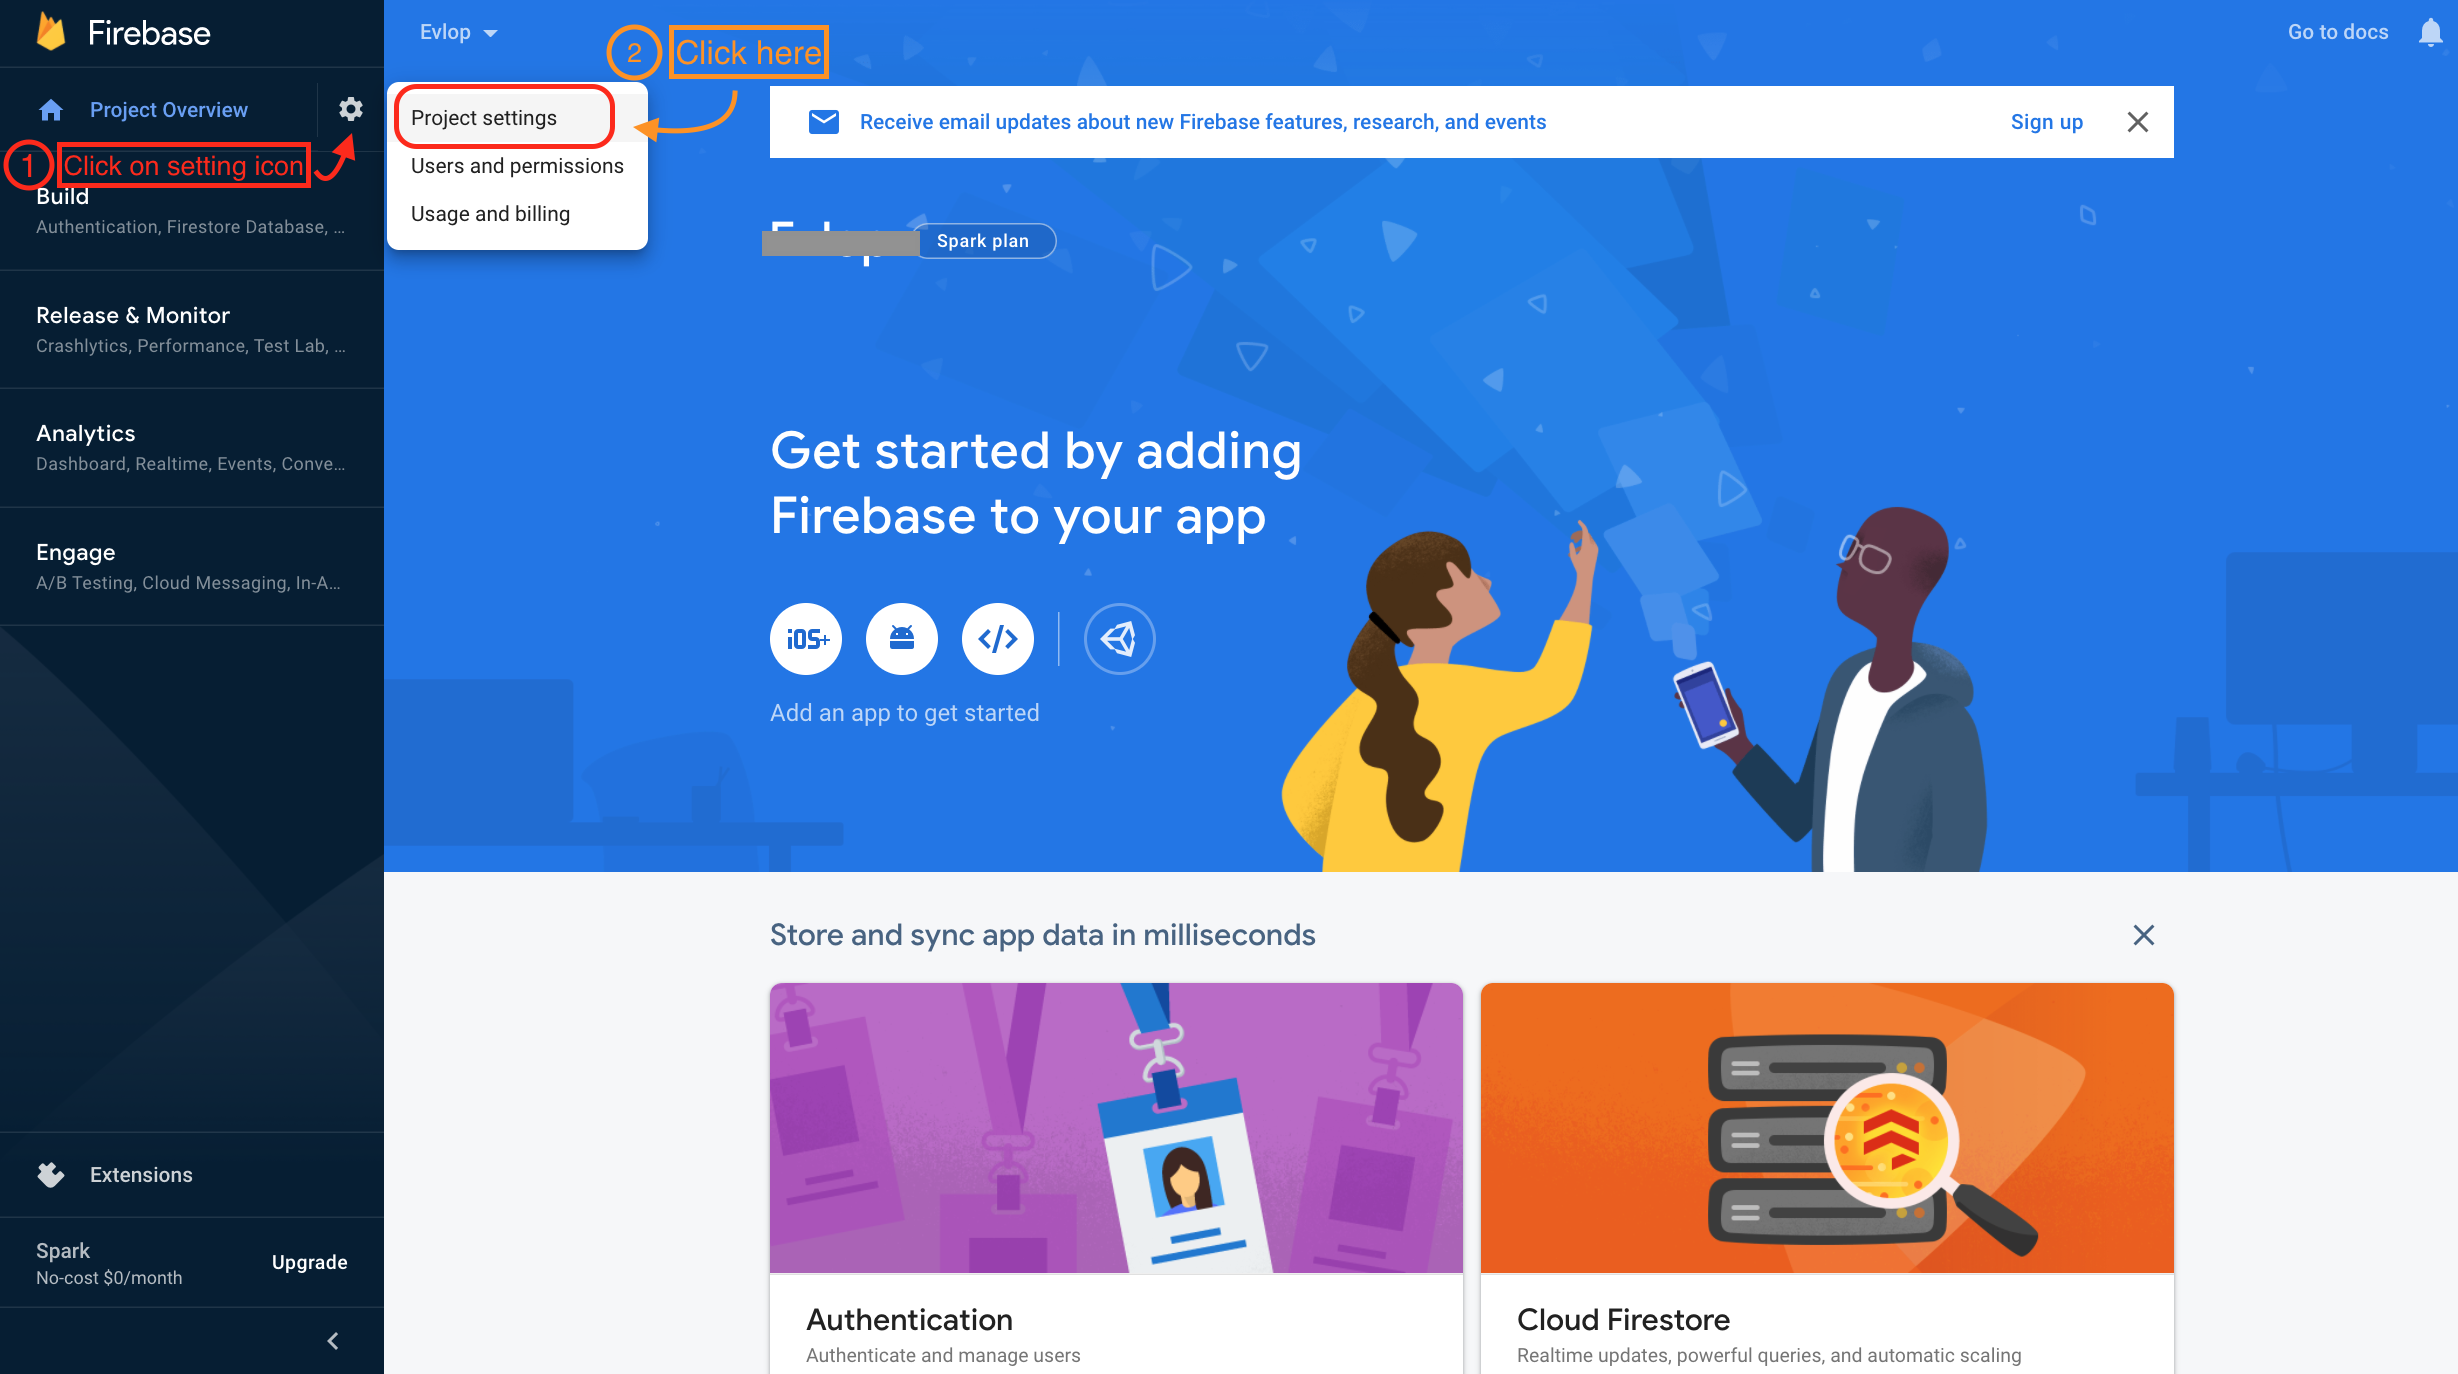
Step 2: Click ⚙️, then select Project settings.
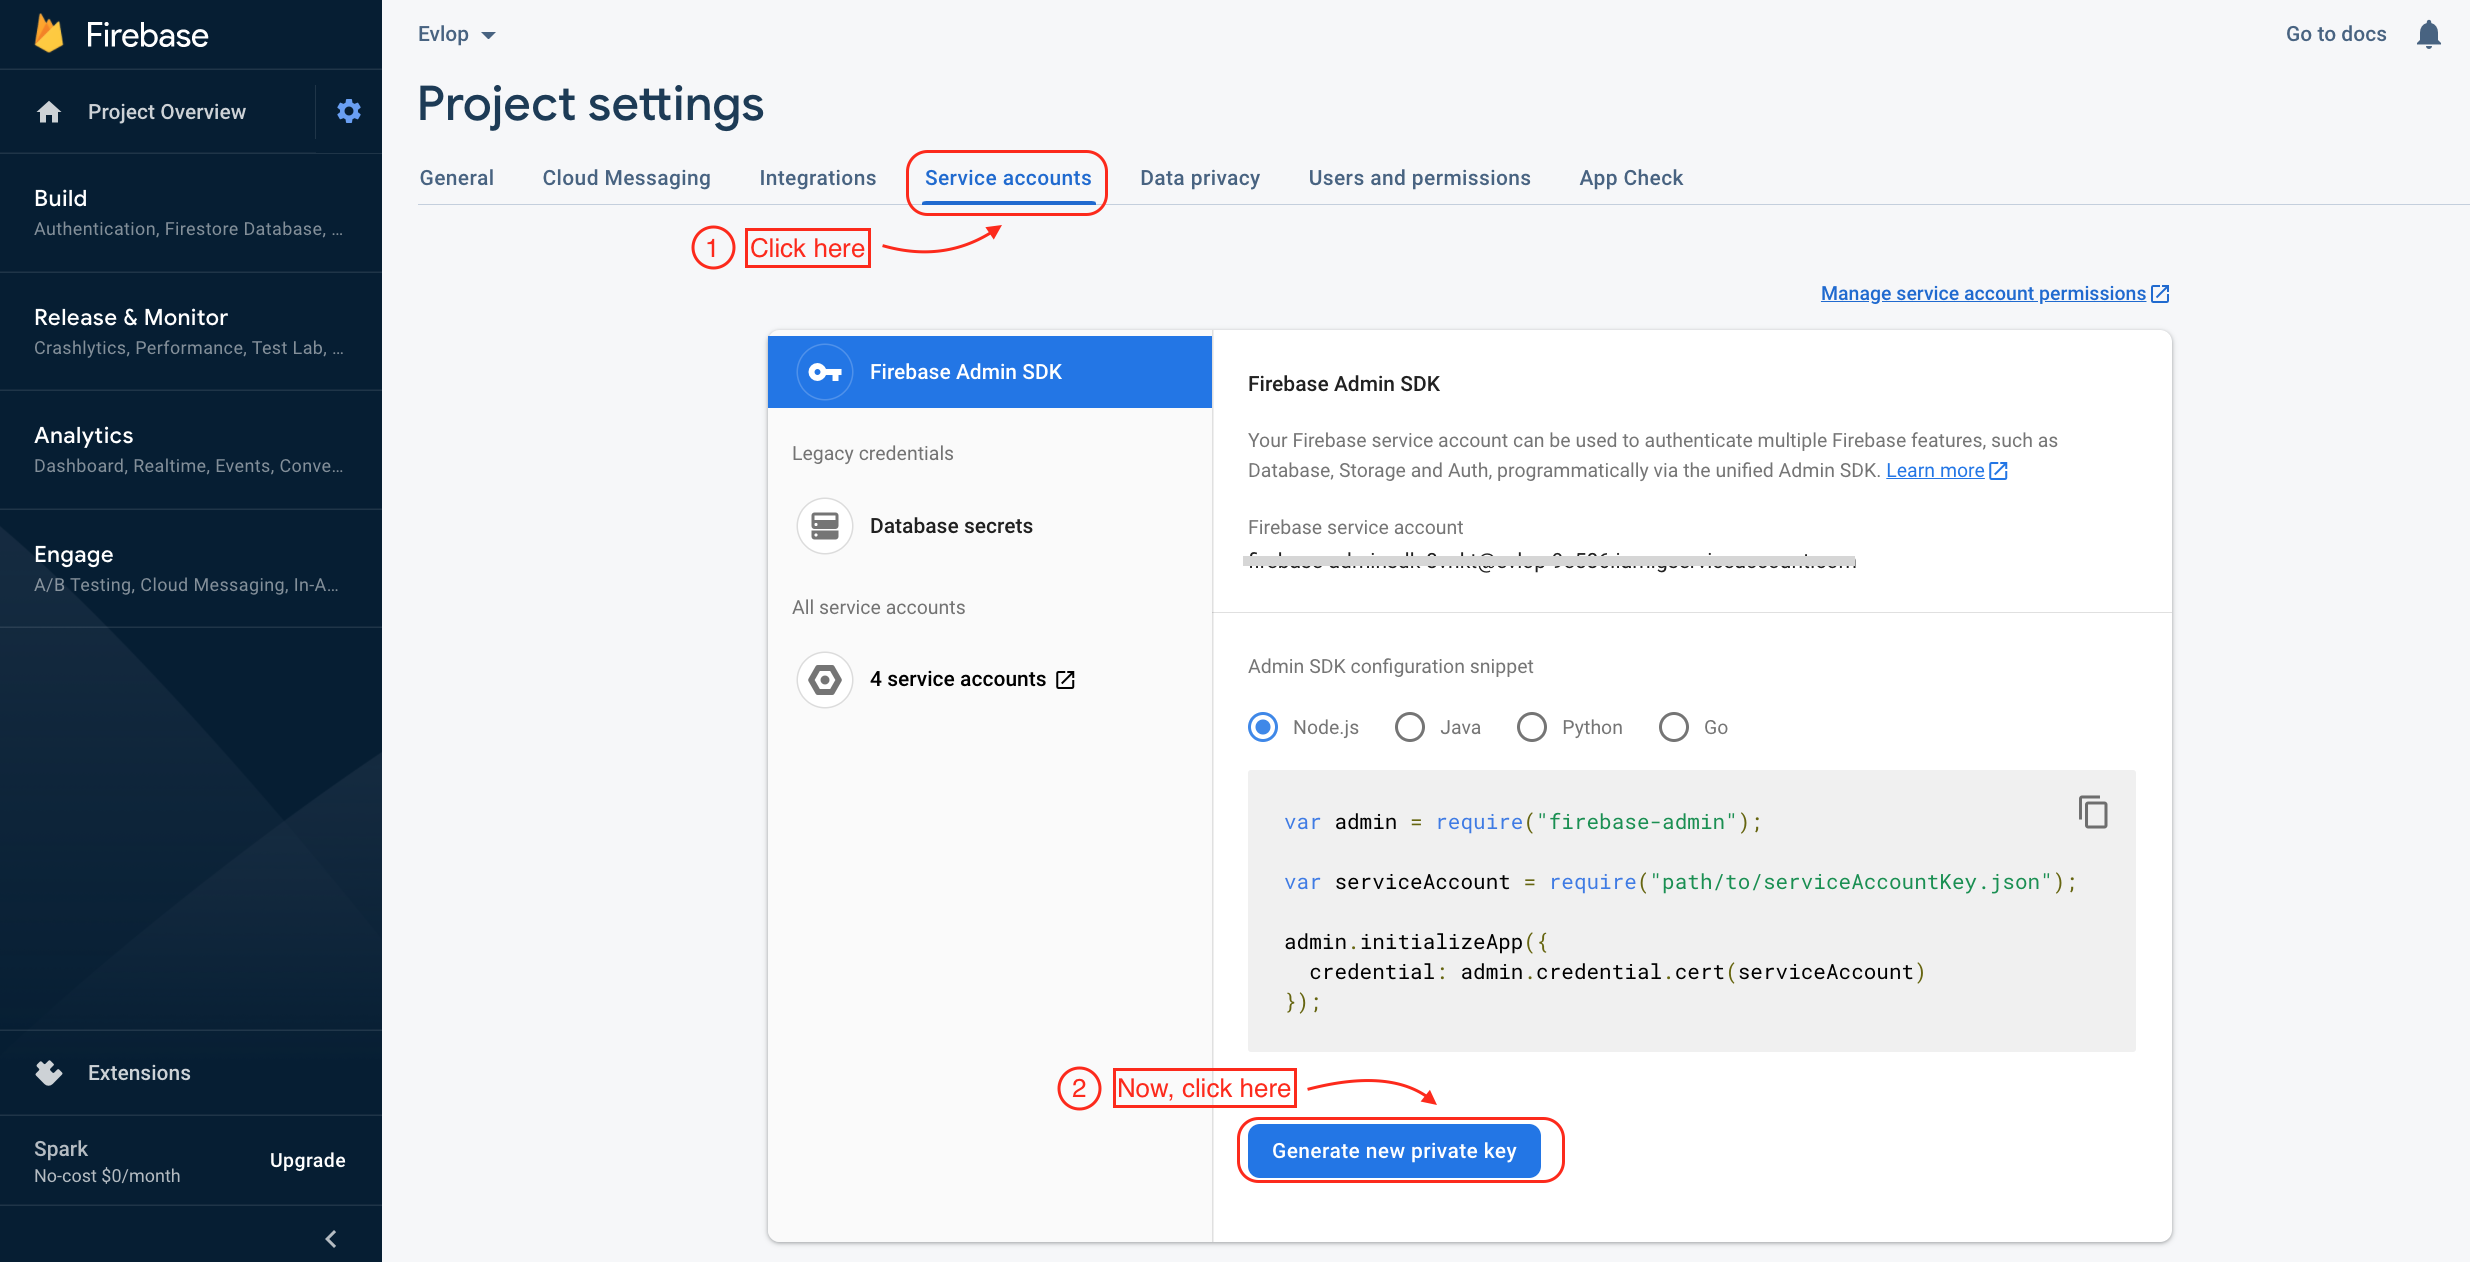
Step 3: Click on ‘Service accounts’, then click on ‘Generate new private key’.
Step 4: Click on generate key and your key file will be automatically downloaded to your computer.

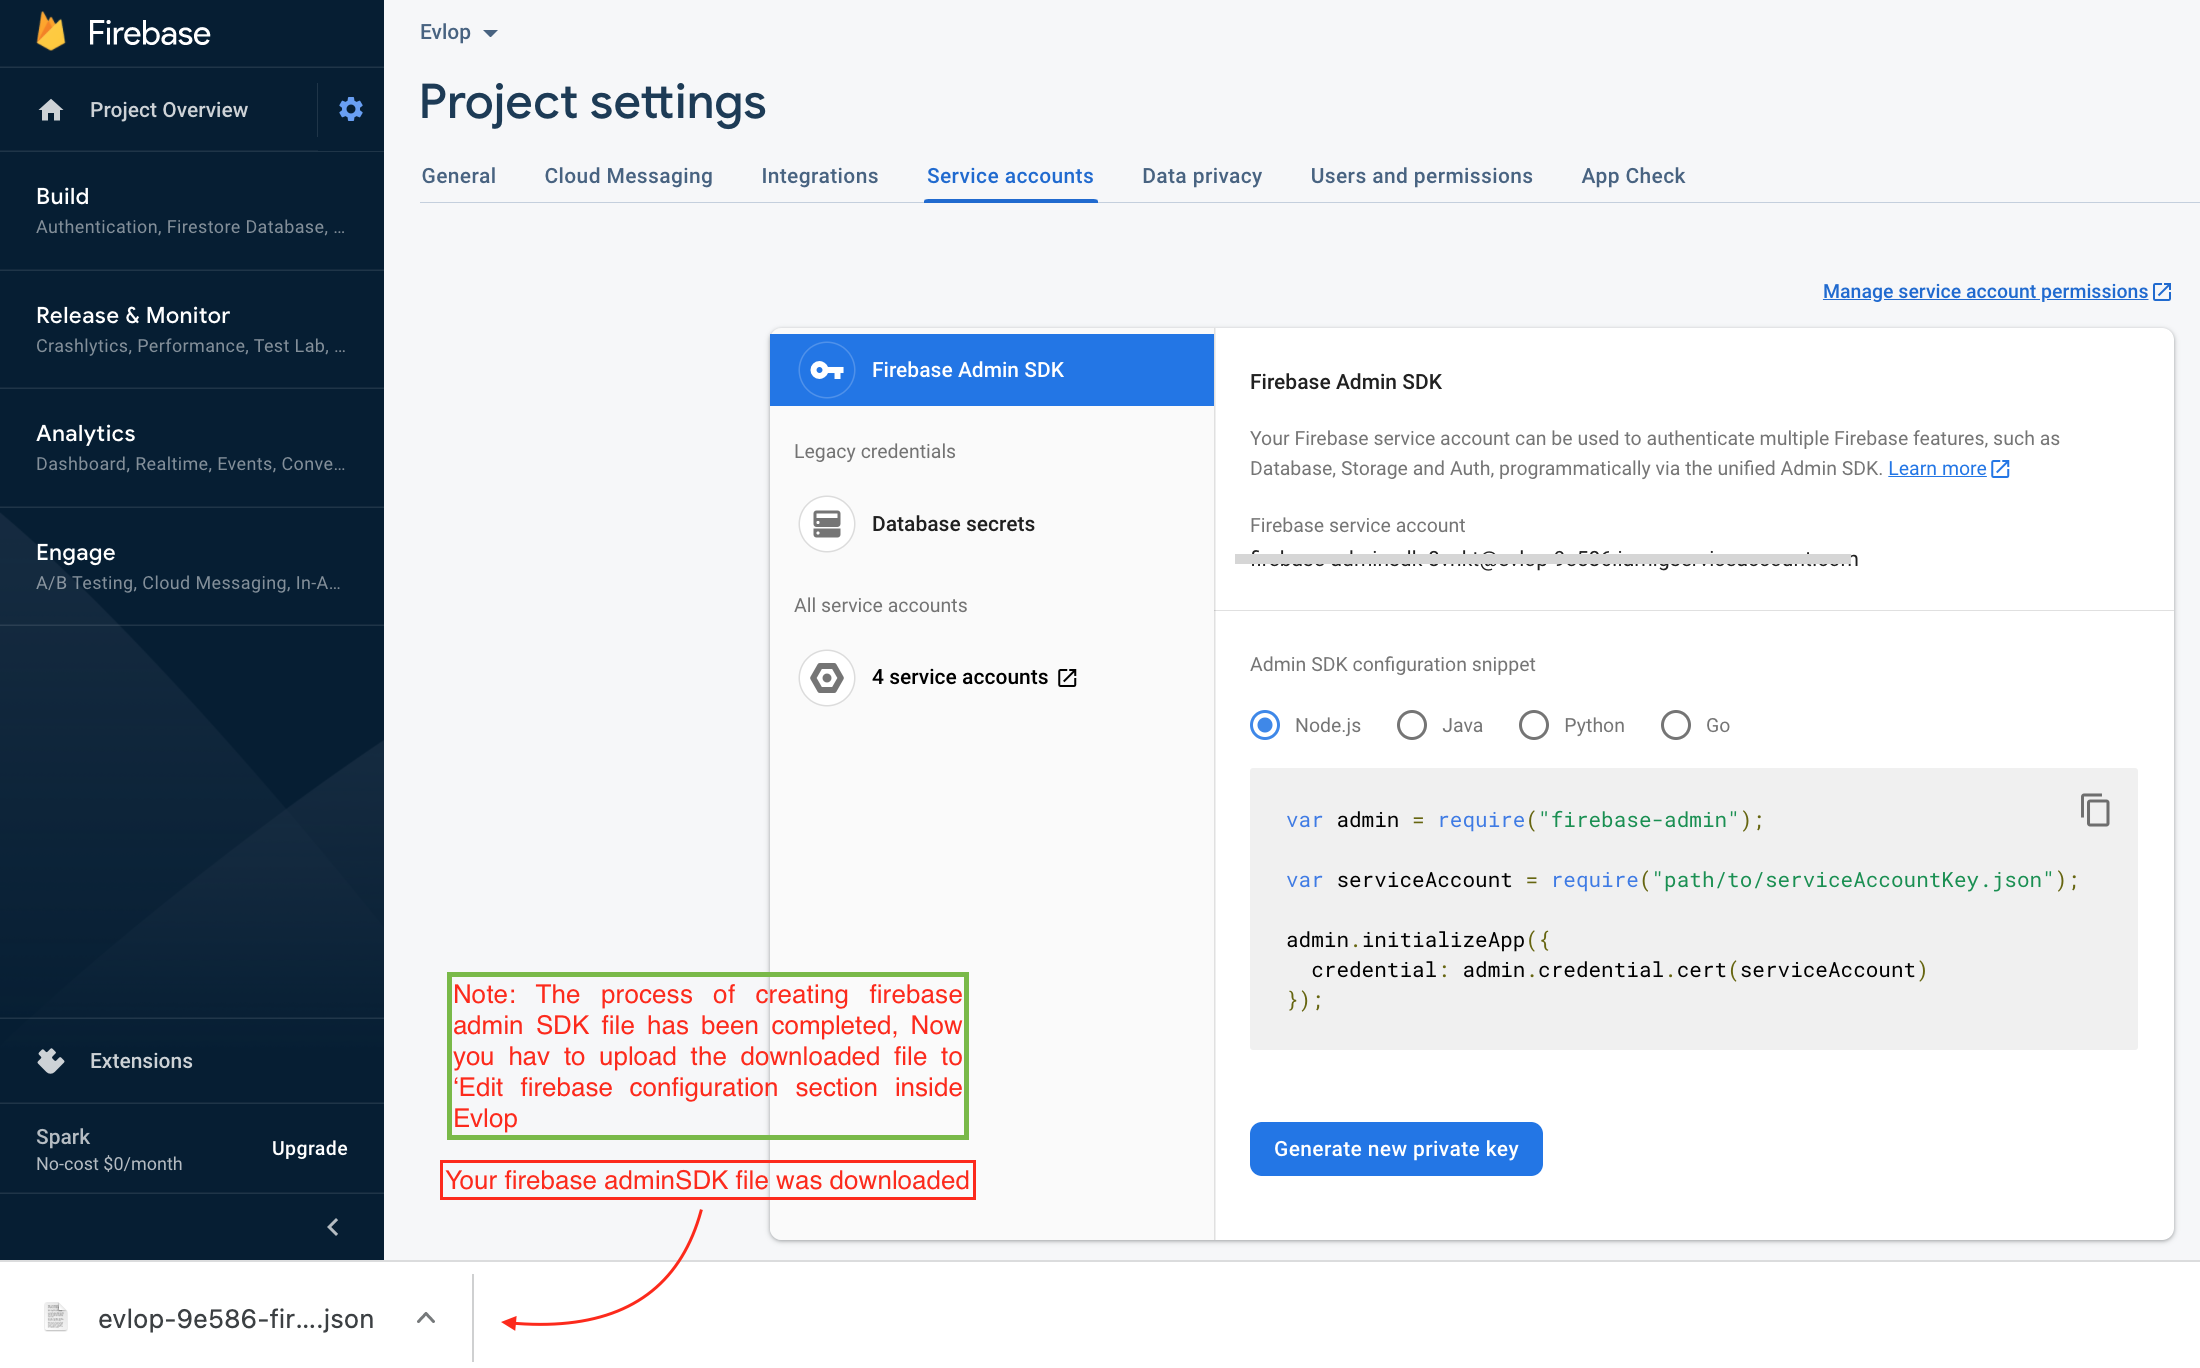
The process of creating and downloading the Firebase admin SDK file is completed, now you’ve to upload the file to the ‘Edit Firebase configuration ‘ section inside Evlop.
Step 5: Upload your ‘-firebase-adminsdk-*.json’ file to your firebase account.
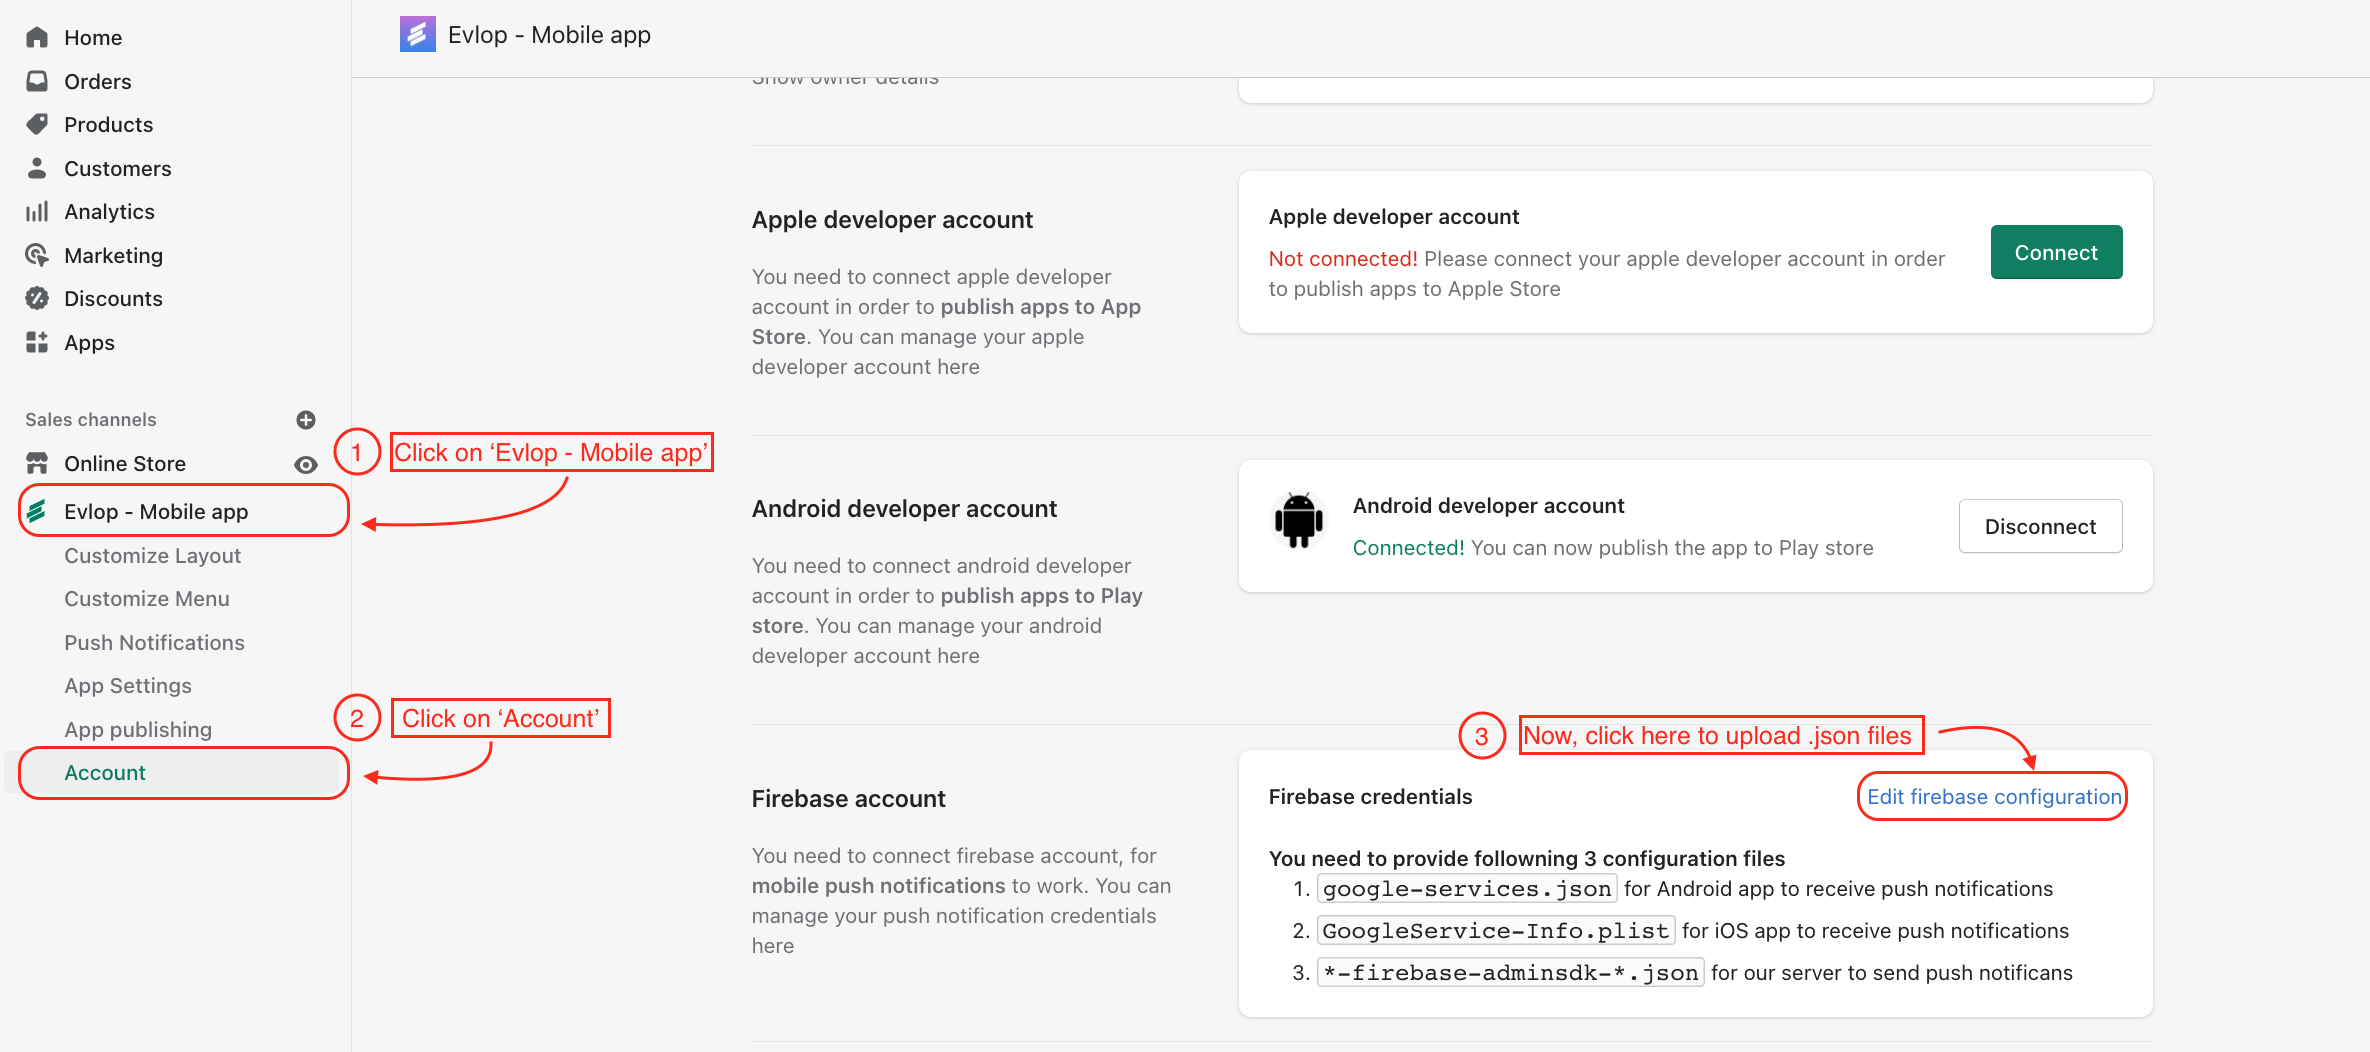
- Go to your Shopify dashboard
- Click on Evlop – Mobile app
- Click on Account
- Now click on Edit firebase configuration
- Select the previously downloaded ‘*-firebase-adminsdk-*.json’ file and save the Firebase credentials.
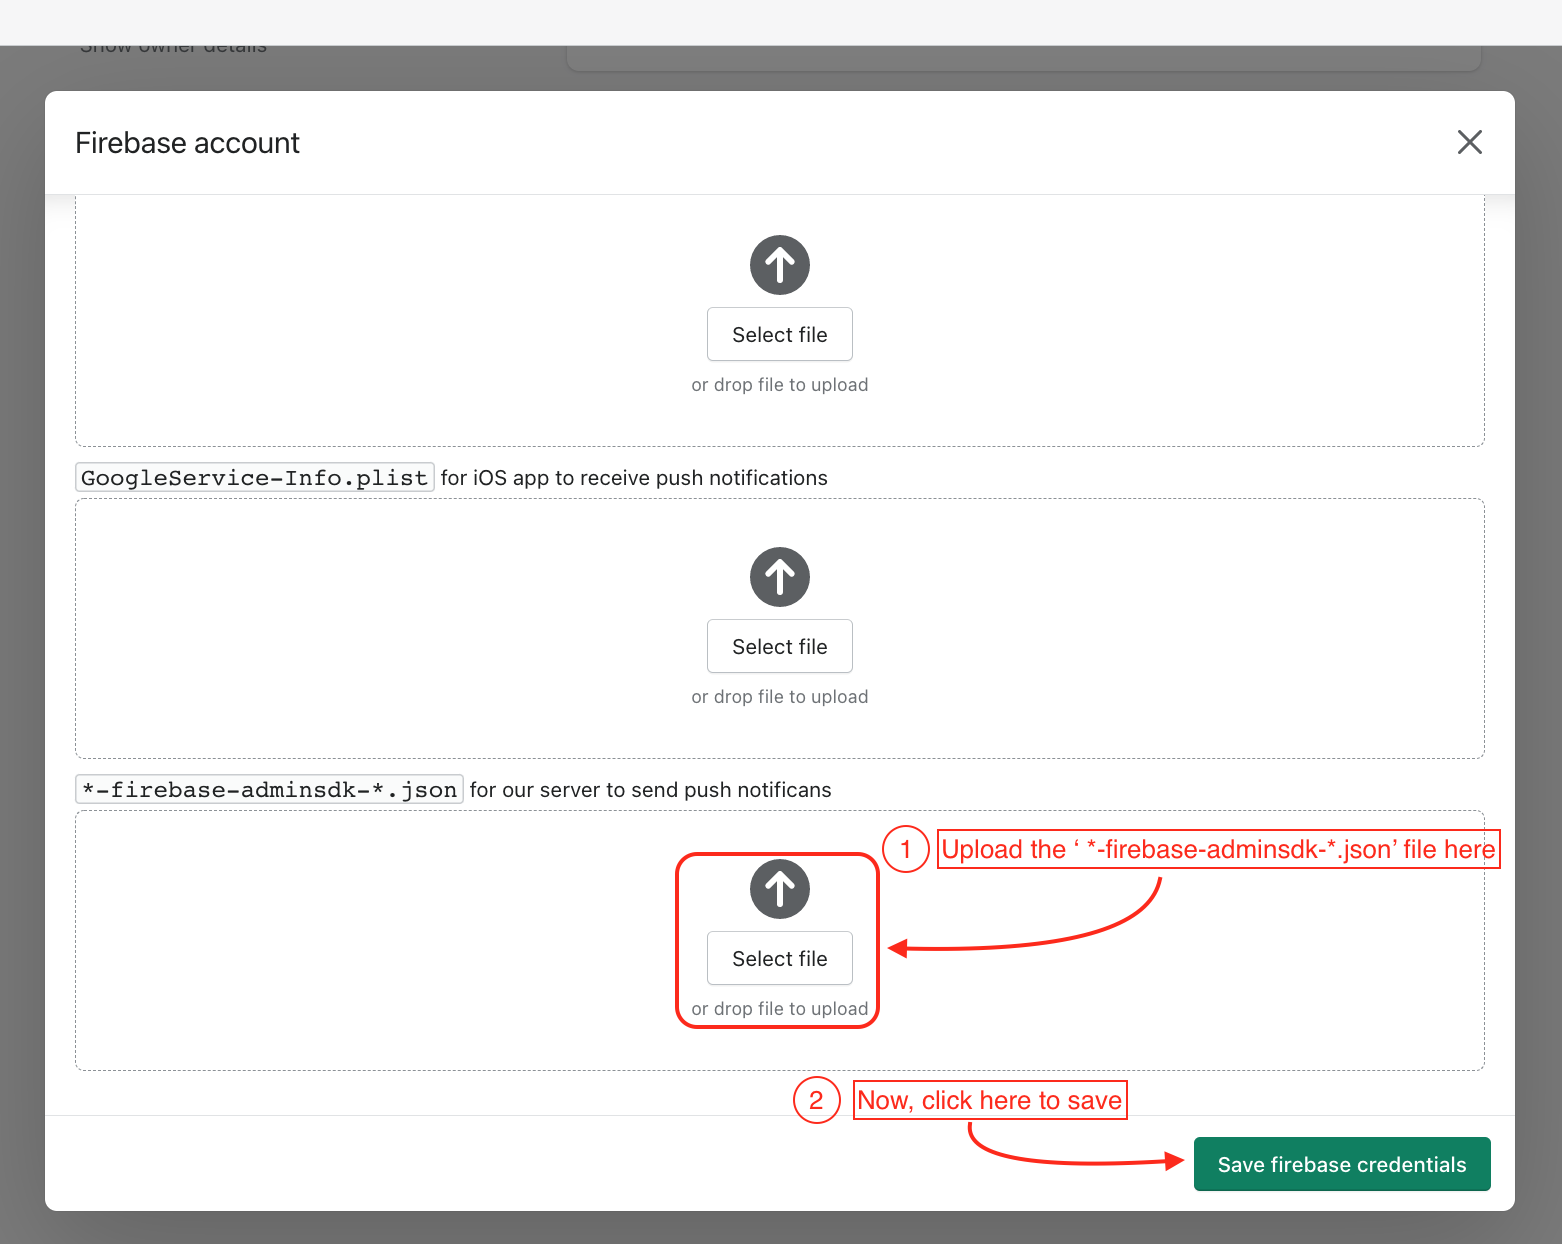
You’ve uploaded ‘*-firebase-adminsdk-*.json’ for firebase integration with evlop server.
You can go to IOS apps for Apple Firebase configuration and Android apps for Android Firebase configuration.