المستندات

كيفية ربط حساب مطور Android.

محدّث 9 أبريل 2025

الخطوة 1: إنشاء حساب خدمة.

أ. مشروع Google Cloud

  • انتقل إلى صفحة Google Cloud Console.
  • وافق على شروط الخدمة
  • اختر مشروعًا أو أنشئ مشروعًا جديدًا

هكذا يمكنك إنشاء مشروعك على Google Cloud Console.

This image has an empty alt attribute; its file name is Google-Cloud-1024x640.pngThis image has an empty alt attribute; its file name is google-cloud-project-1024x640.pngThis image has an empty alt attribute; its file name is Google-cloud-new-project-1024x640.png

سيتم إنشاء مشروعك بهذه الطريقة، لننتقل الآن إلى إنشاء حساب خدمة.

ب. حساب الخدمة

  • افتح الشريط الجانبي.
  • انقر على IAM & Admin
  • انقر على Service Accounts.

This image has an empty alt attribute; its file name is create-service-account-1024x640.png

  • + إنشاء حساب خدمة (Service Account)

This image has an empty alt attribute; its file name is create-service-account-1-1024x640.png

  • تفاصيل حساب الخدمة

This image has an empty alt attribute; its file name is service-account-details-1024x640.png

  • دور حساب الخدمة

This image has an empty alt attribute; its file name is Service-account-role-1024x640.png

  • امنح حساب الخدمة دور المالك (Owner).

This image has an empty alt attribute; its file name is service-account-role-owner-1024x640.png

  • تم إنشاء حساب الخدمة بدور المالك.

This image has an empty alt attribute; its file name is service-account-created-1024x640.png

C. المفتاح الخاص لتطبيقك على Evlop.

  • انتقل إلى قائمة الإجراءات.
  • انقر على Manage Keys

This image has an empty alt attribute; its file name is manage-keys-1024x640.png

  • انقر على القائمة المنسدلة ‘Add key’.
  • انقر على ‘Create new key’

This image has an empty alt attribute; its file name is create-new-key-1024x640.png

  • اختر صيغة الملف ‘JSON’.
  • أنشئ

This image has an empty alt attribute; its file name is private-key-JSON-1024x640.png

  • تم الآن حفظ المفتاح الخاص على جهاز الكمبيوتر لديك.

This image has an empty alt attribute; its file name is private-key-saved-1024x640.png

الخطوة 2: تفعيل واجهة برمجة تطبيقات Play Store

لقد أكملنا خطوة إنشاء حساب الخدمة وقمنا أيضاً بتنزيل المفتاح الخاص الذي نحتاجه للاتصال بـ Evlop، والآن لننتقل إلى تفعيل واجهة برمجة تطبيقات Play Store.

  • عُد إلى صفحة حسابات الخدمة.

This image has an empty alt attribute; its file name is back-to-the-service-account-page-1024x640.png

  • انسخ معرّف البريد الإلكتروني لحساب الخدمة لاستخدامه في الخطوة التالية.

This image has an empty alt attribute; its file name is Copy-your-service-account-email-id-1024x640.png

  • انقر على قائمة الهامبرغر
  • انقر على 'APIs & Services'
  • انقر على 'Enabled APIs & services'

This image has an empty alt attribute; its file name is Enabled-APIs-services-1024x640.png

  • انقر على '+ENABLE APIS AND SERVICES'

This image has an empty alt attribute; its file name is ENABLE-APIS-AND-SERVICES-1024x640.png

  • مرّر للأسفل.
  • حدّد موقع 'Google Play Android Developer API' وانقر عليه

This image has an empty alt attribute; its file name is play-android-api-1024x640.png

  • تفعيل Google Play Android Developer API

This image has an empty alt attribute; its file name is enable-Google-Play-Android-Developer-API-1024x640.pngThis image has an empty alt attribute; its file name is Google-Play-Android-Developer-API-Enabled-1024x640.png

تم تفعيل Google Play Android Developer API بنجاح.

الخطوة 3: منح حساب الخدمة صلاحية الوصول كمسؤول.

  • انتقل إلى Google Play Console.
  • اذهب إلى صفحة Users and Permissions من الشريط الجانبي.
  • انقر على ‘Invite New User’

This image has an empty alt attribute; its file name is Users-and-permissions-1024x640.png

  • الصق معرّف البريد الإلكتروني لحساب الخدمة الذي نسخته سابقًا.
  • انقر على «Account Permissions».
  • حدّد مربع «Admin (all permissions)».
  • انقر على «Invite User»

This image has an empty alt attribute; its file name is invite-new-user-1024x640.png

  • أكّد الدعوة

This image has an empty alt attribute; its file name is Confirm-the-invitation-1024x640.png

الخطوة 4: اربط حساب مطوّر Android.

بعد الانتهاء، افتح لوحة تحكم Shopify لربط Evlop بحسابك كمطوّر Android.

اتبع الخطوات التالية:

  • انقر على Evlop ضمن قسم Sales Channel.
  • انقر على Account.
  • انقر على Connect داخل مربع قسم حساب مطوّر Android.
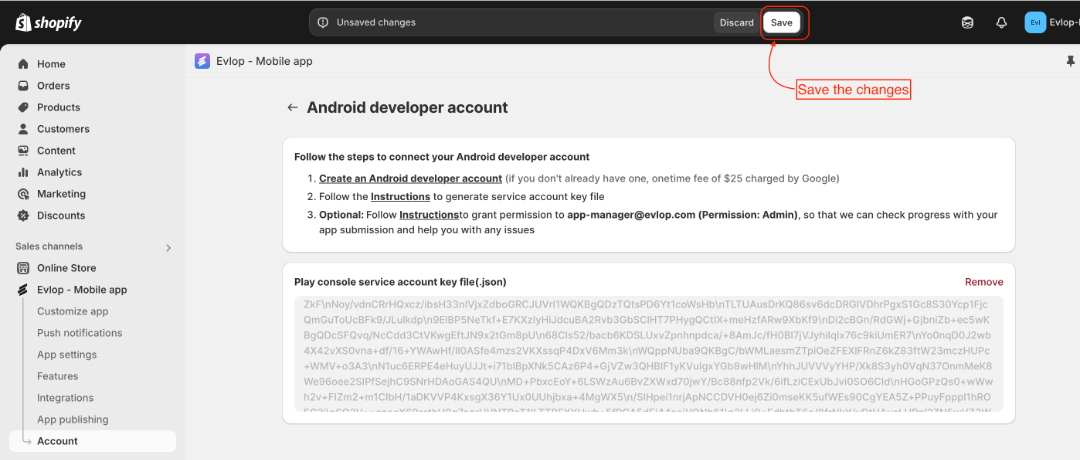
  • الآن، ارفع ملف المفتاح الخاص ثم احفظ التغييرات.
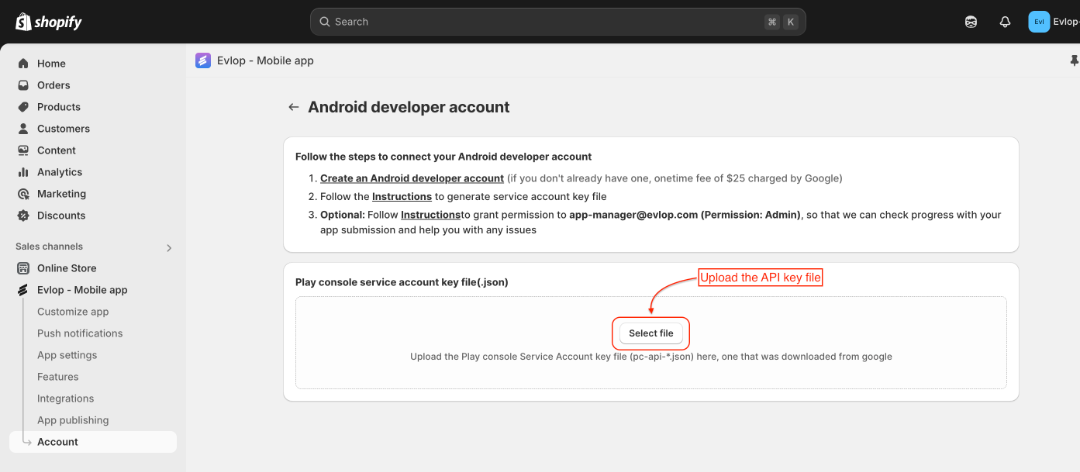
الآن، لقد اتصلت بنجاح بحساب مطوّر Android وأصبحت جاهزًا للمتابعة مع عملية نشر تطبيق Android.