While submitting your iOS app to the Apple App Store, it is essential to confirm that you have finished the app’s fundamental design and successfully linked it to your Apple Developer Account. If you haven’t connected it yet, kindly proceed with the Apple developer account connection.
Now, you can proceed further with the App publishing to the Apple App Store.
Step 1: Create an app inside your App Store Connect. ➕
- Login to your App Store Connect.
- Click on My Apps.

- Click the ‘+’ sign
- Click on New App to create a new app for your store.

- A new app form will appear on the screen.
- Check ✅ the iOS for Platforms.
- Name your App
- Select your preferred default language.
- Click on Bundle ID selector Dropdown.

- Now select Bundle ID that includes evlop and the store name you’ve used for your app on the Shopify Dashboard.

- Enter your SKU.
- Select Full Access on user access.
- Click Create.

Your app will be created for the required store name and the bundle ID.

Step 2: Request an app build to the App Store 📱.
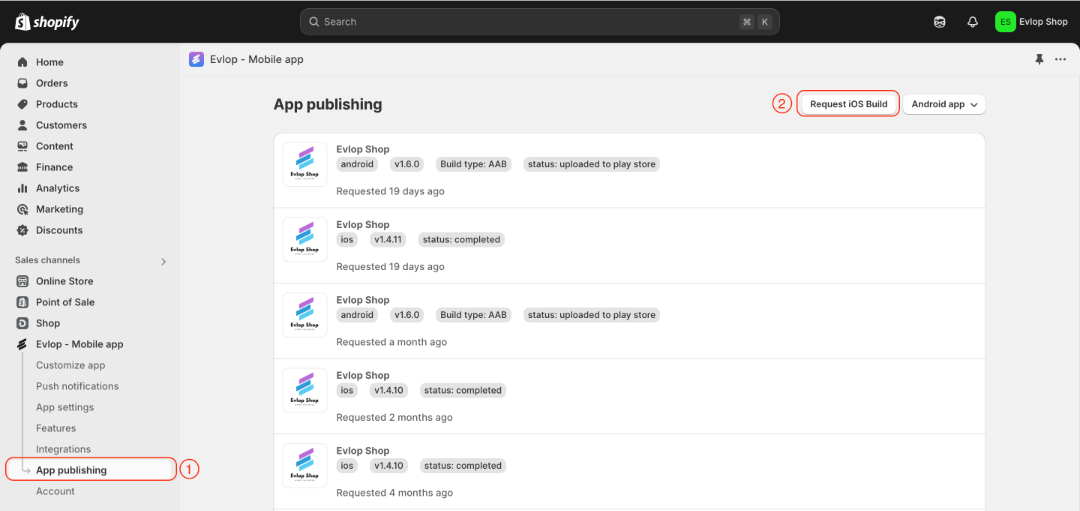
- Now, go back to the Evlop – Mobile app‘s Shopify dashboard.
- Go to the App Publishing page.
- Click Request iOS Build

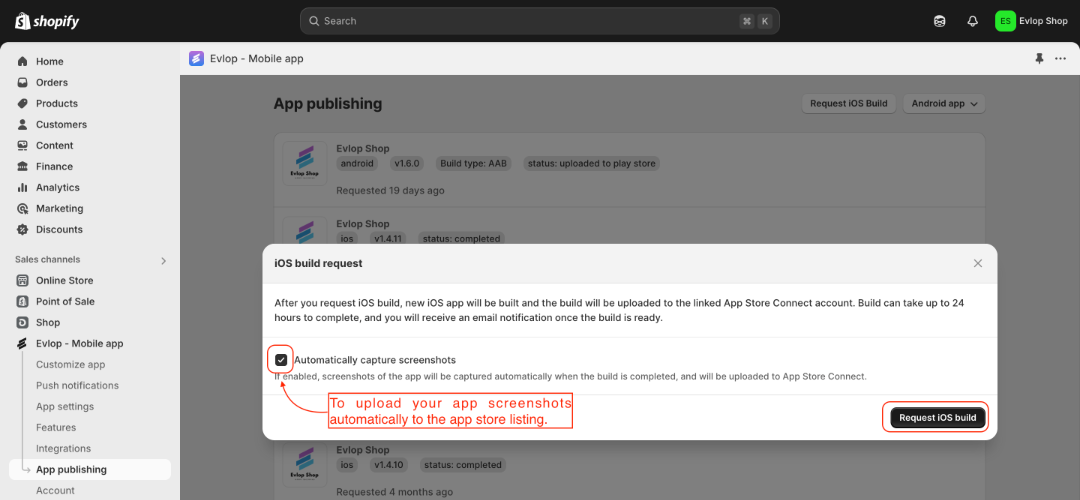
- Check ✅ the Automatically capture screenshots option if you want our system to take and upload your app screenshots to the app store listing.
- Request iOS build


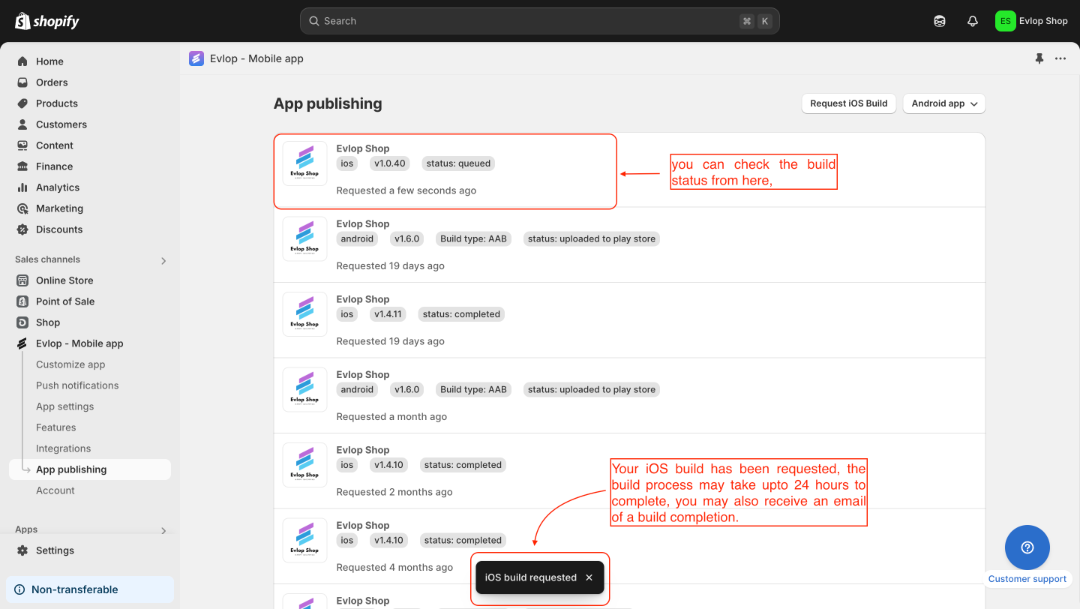
The request to submit the app bundle to the App Store has been made. It may take a few hours to up to 24 hours for the process to complete, and you’ll see a “completed” status when it’s done.
Note: If you see the status of Build Failed then request for a build again and inform Evlop customer support.
Step 3: Internal testing (optional) 🕵🏻
- Now, go back to the App Store Connect.
- Click on an app that you’ve created.

- Click the Testflight tab to check if the build is uploaded.

- Click on Create Group for internal Testing.

- Name the Group.
- Check ✅ Enable Automatic distribution.
- Click Create.

After creating the Tester Group you will see the Name and Email IDs of the users with access and assigned roles.
- Select users for the tester.
- Click Add.

An invitation has been sent to testers. To get started, check your email and accept the invitation. Next, install the TestFlight app from the App Store. Once installed, you can use TestFlight to easily install and test your app on your iPhones.

Step 4: Store Listing Setup and App Submission 🚀
- Complete the Store listing details and information to meet the App Requirements and guidelines.
- Save the changes.

- Click Add for review.
- You will see a dialogue box if you missed anything.
- Follow the steps mentioned in the dialogue that appeared until completed.

After completing all the steps mentioned and guided, click Add for Review and submit your app for review. The review process typically take around 48 hours and upon successful review, your app will be live.
