Step 1: Open Evlop – Mobile app.
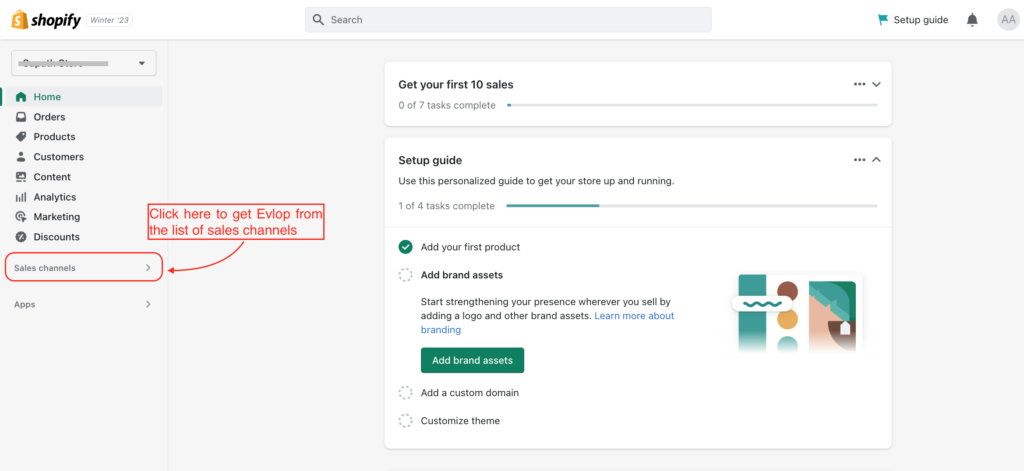
- Go to Shopify dashboard
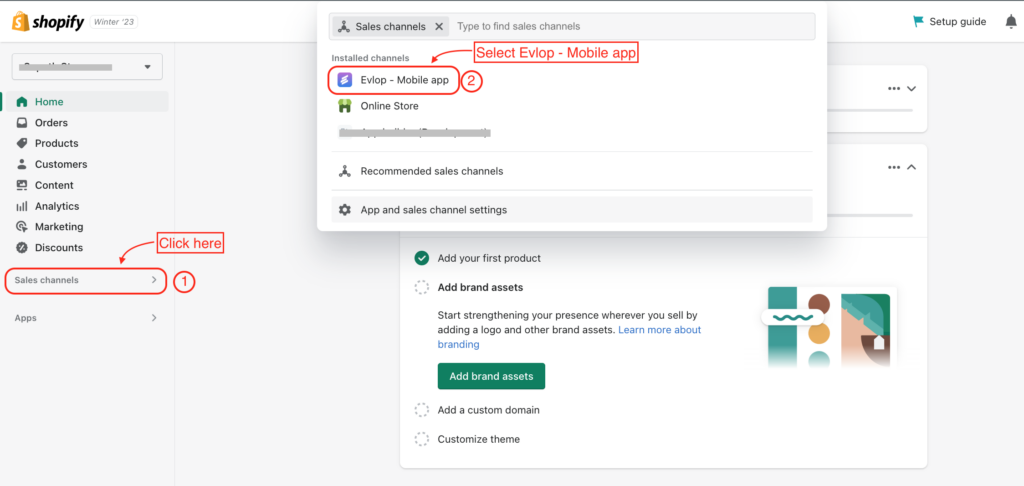
- click on Sales channel
- Select Evlop – Mobile app
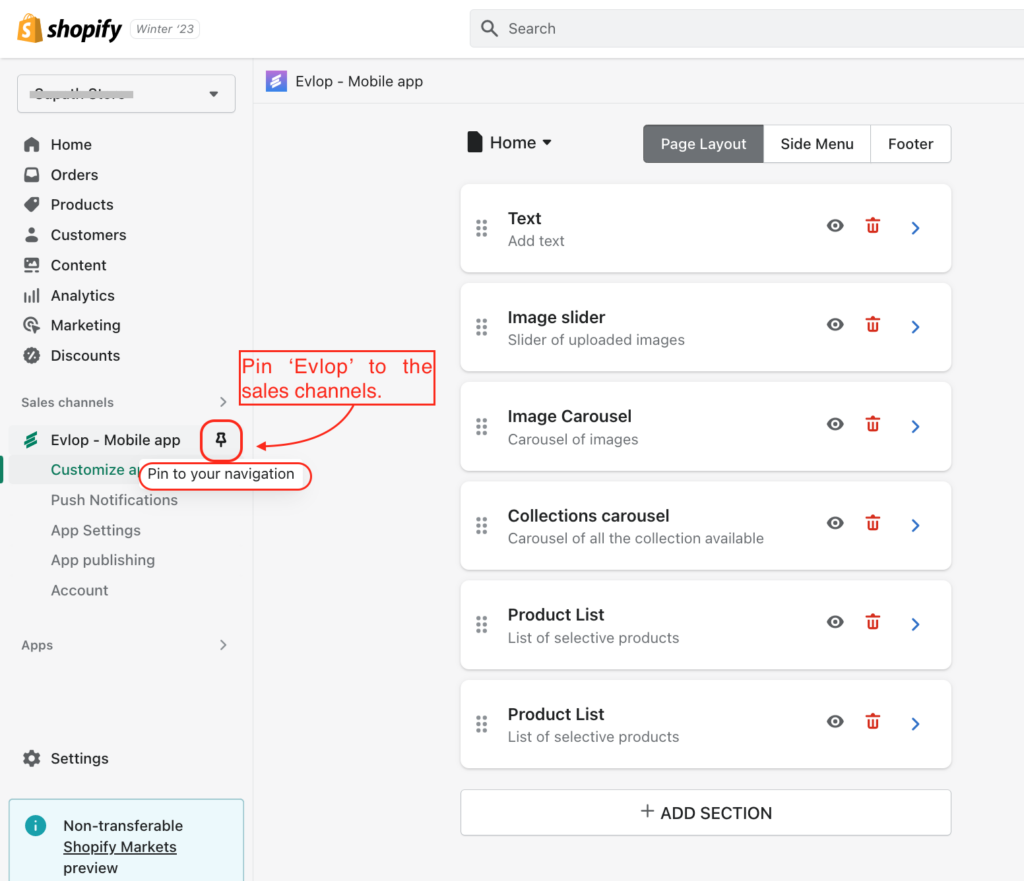
- Now Pin 📌 Evlop to the sales channel for easy access.
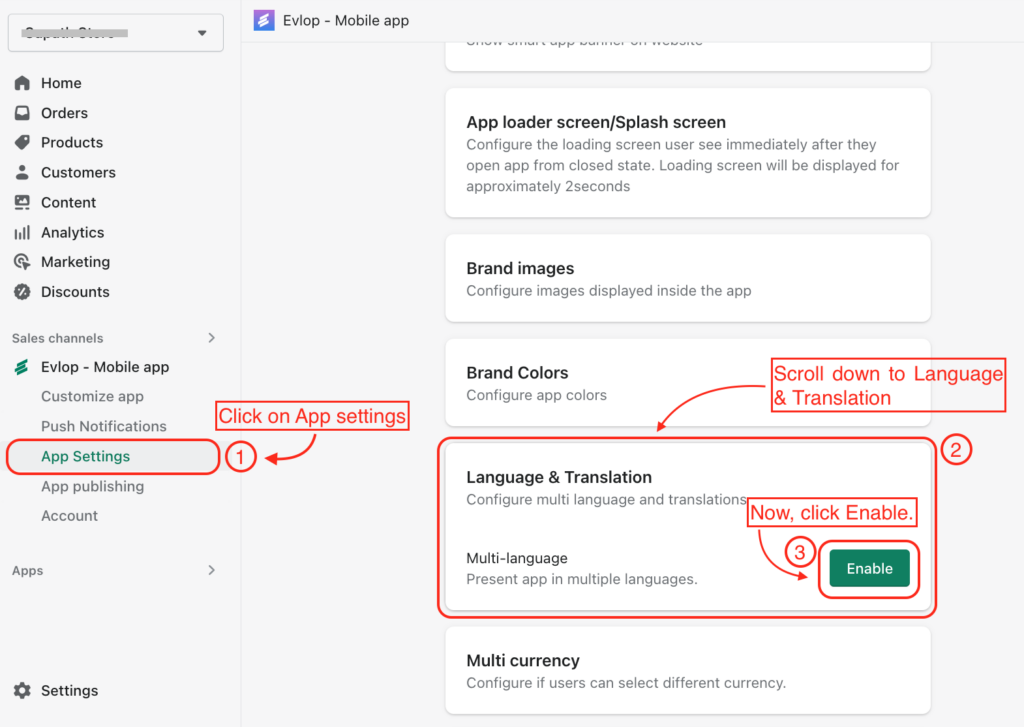
Step 2: Feature Enable.
- Click on App settings
- Scroll down and click on the Language and Translation option.
- Enable.
- Save the changes.
- Now click on Edit translations

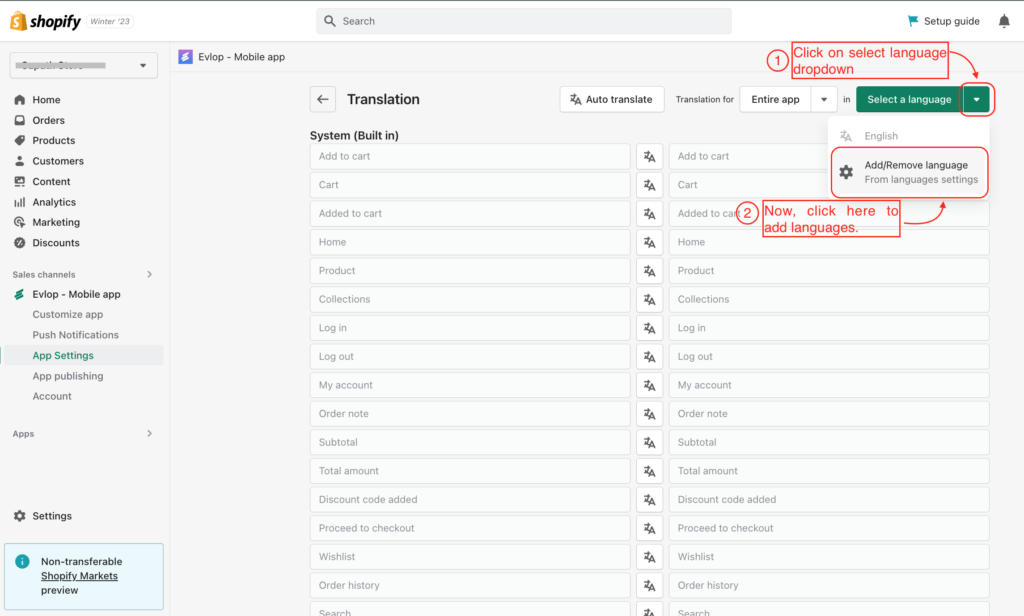
Step 3: Select/ Add language.
- Click on Select a language dropdown ▼
- Now click on Add/Remove language.
NOTE: Already added/ available languages would also be shows up on the dropdown.
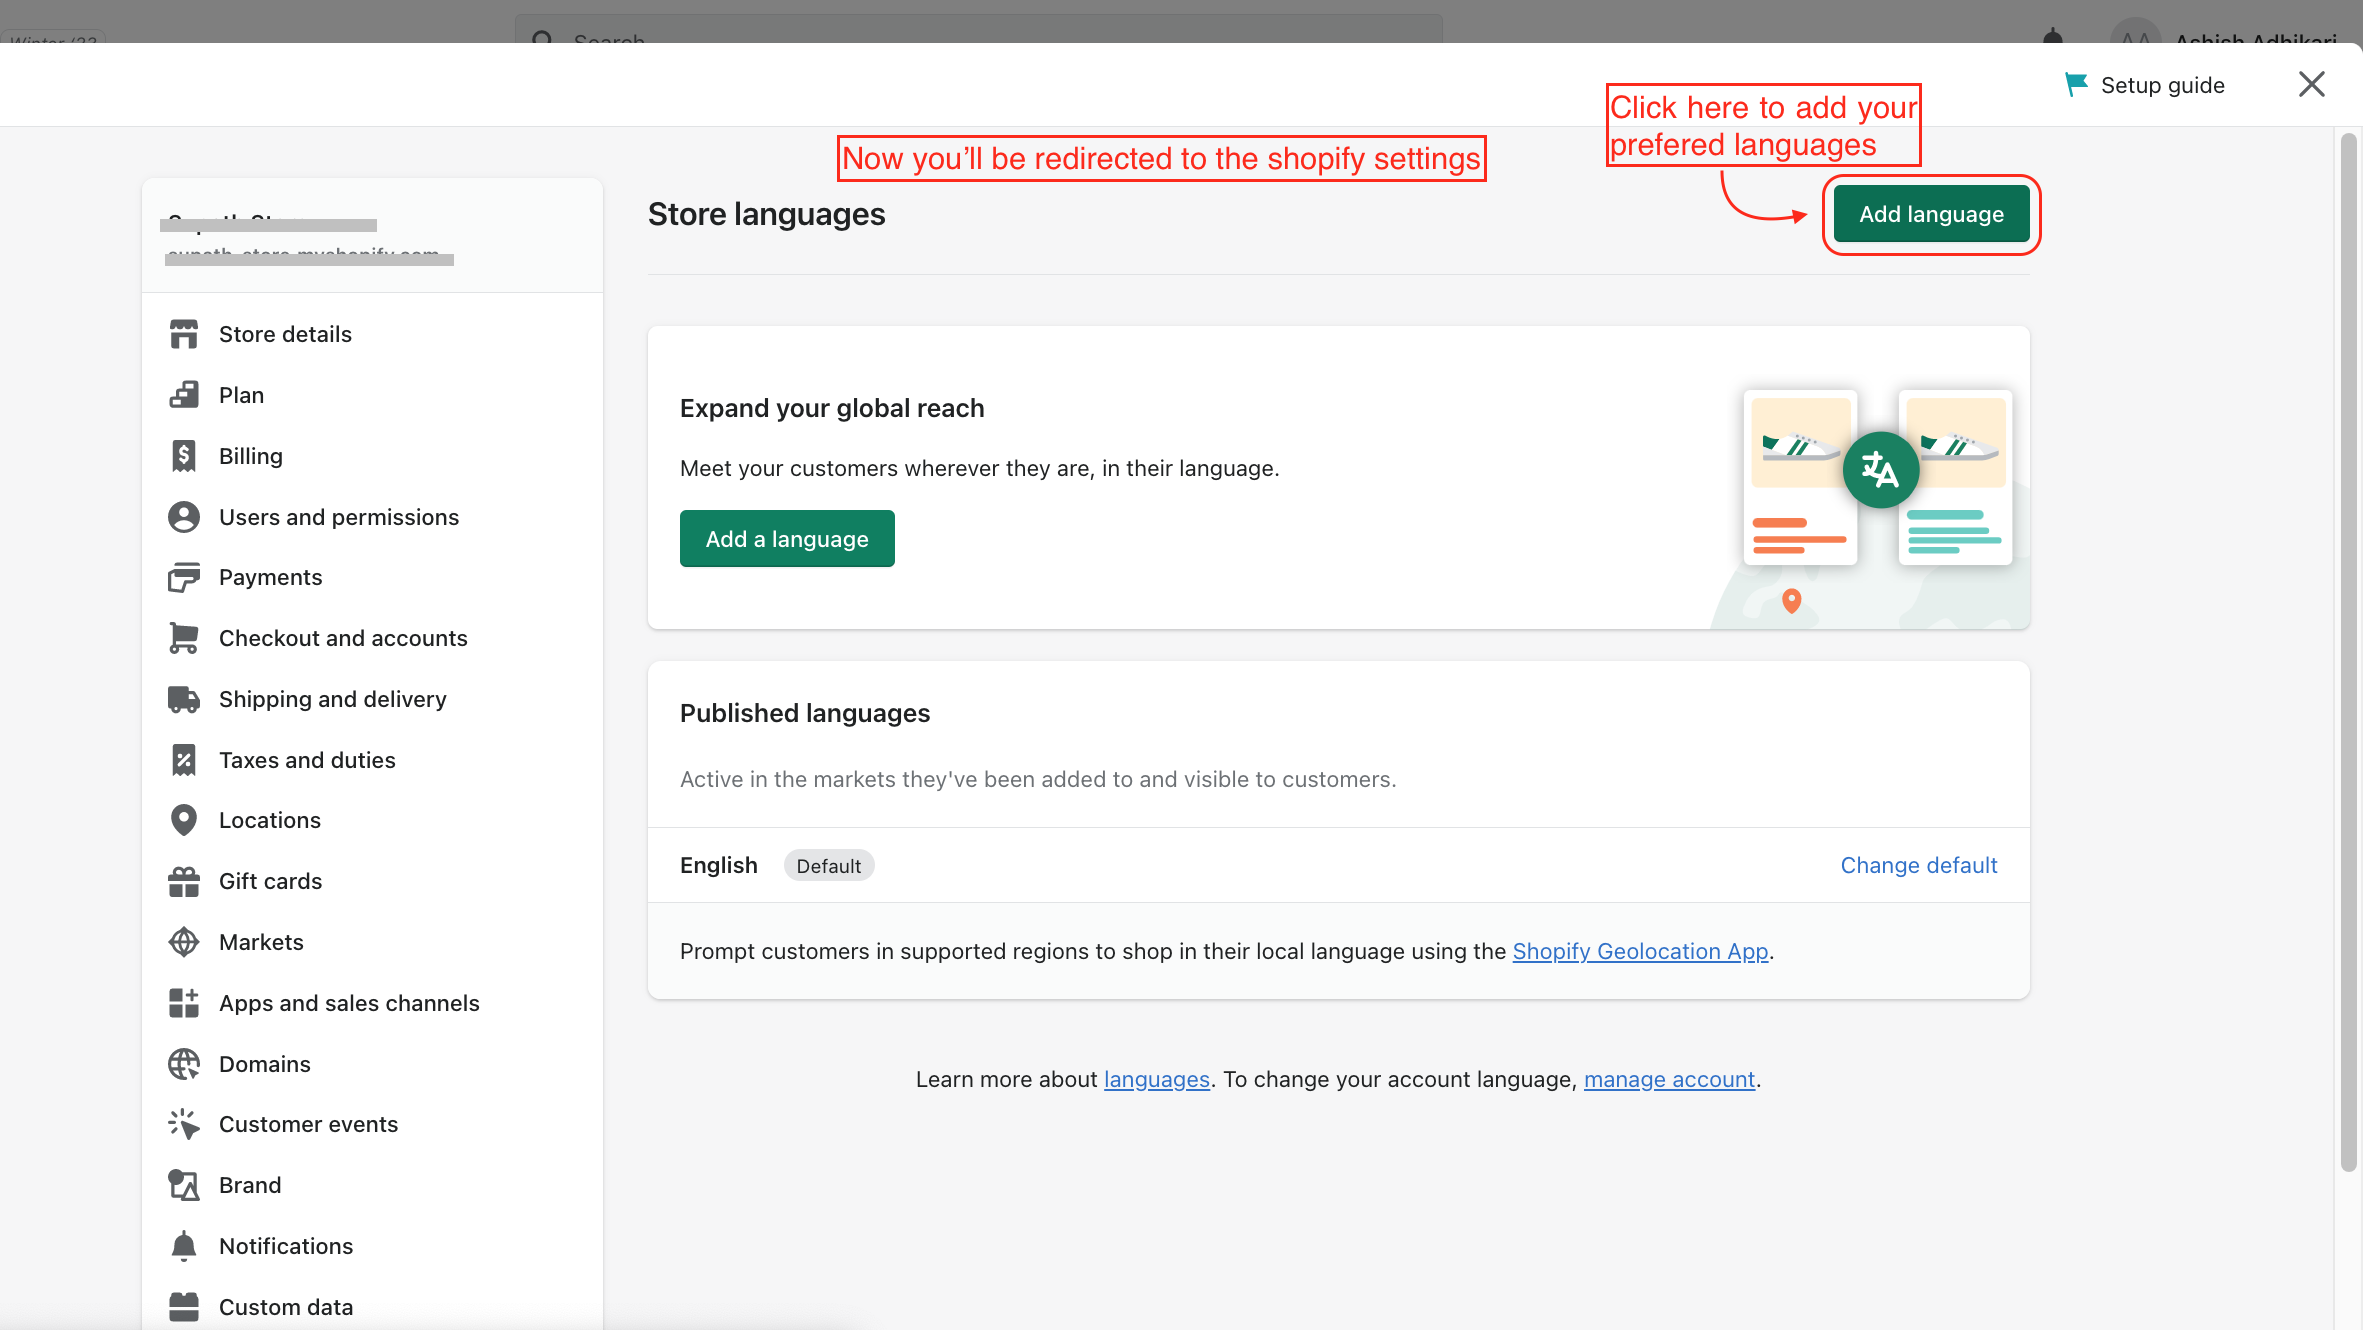
A: Now you’ll be redirected to the Shopify settings page.
- Click on Add Language.
- Select your preferred Language.
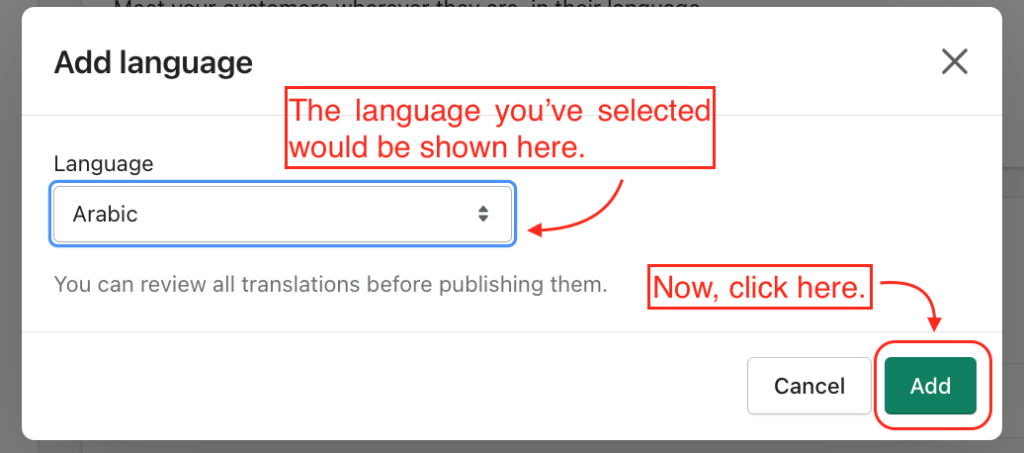
B: Select your Preferred language.
Here we’ve selected Arabic⬇
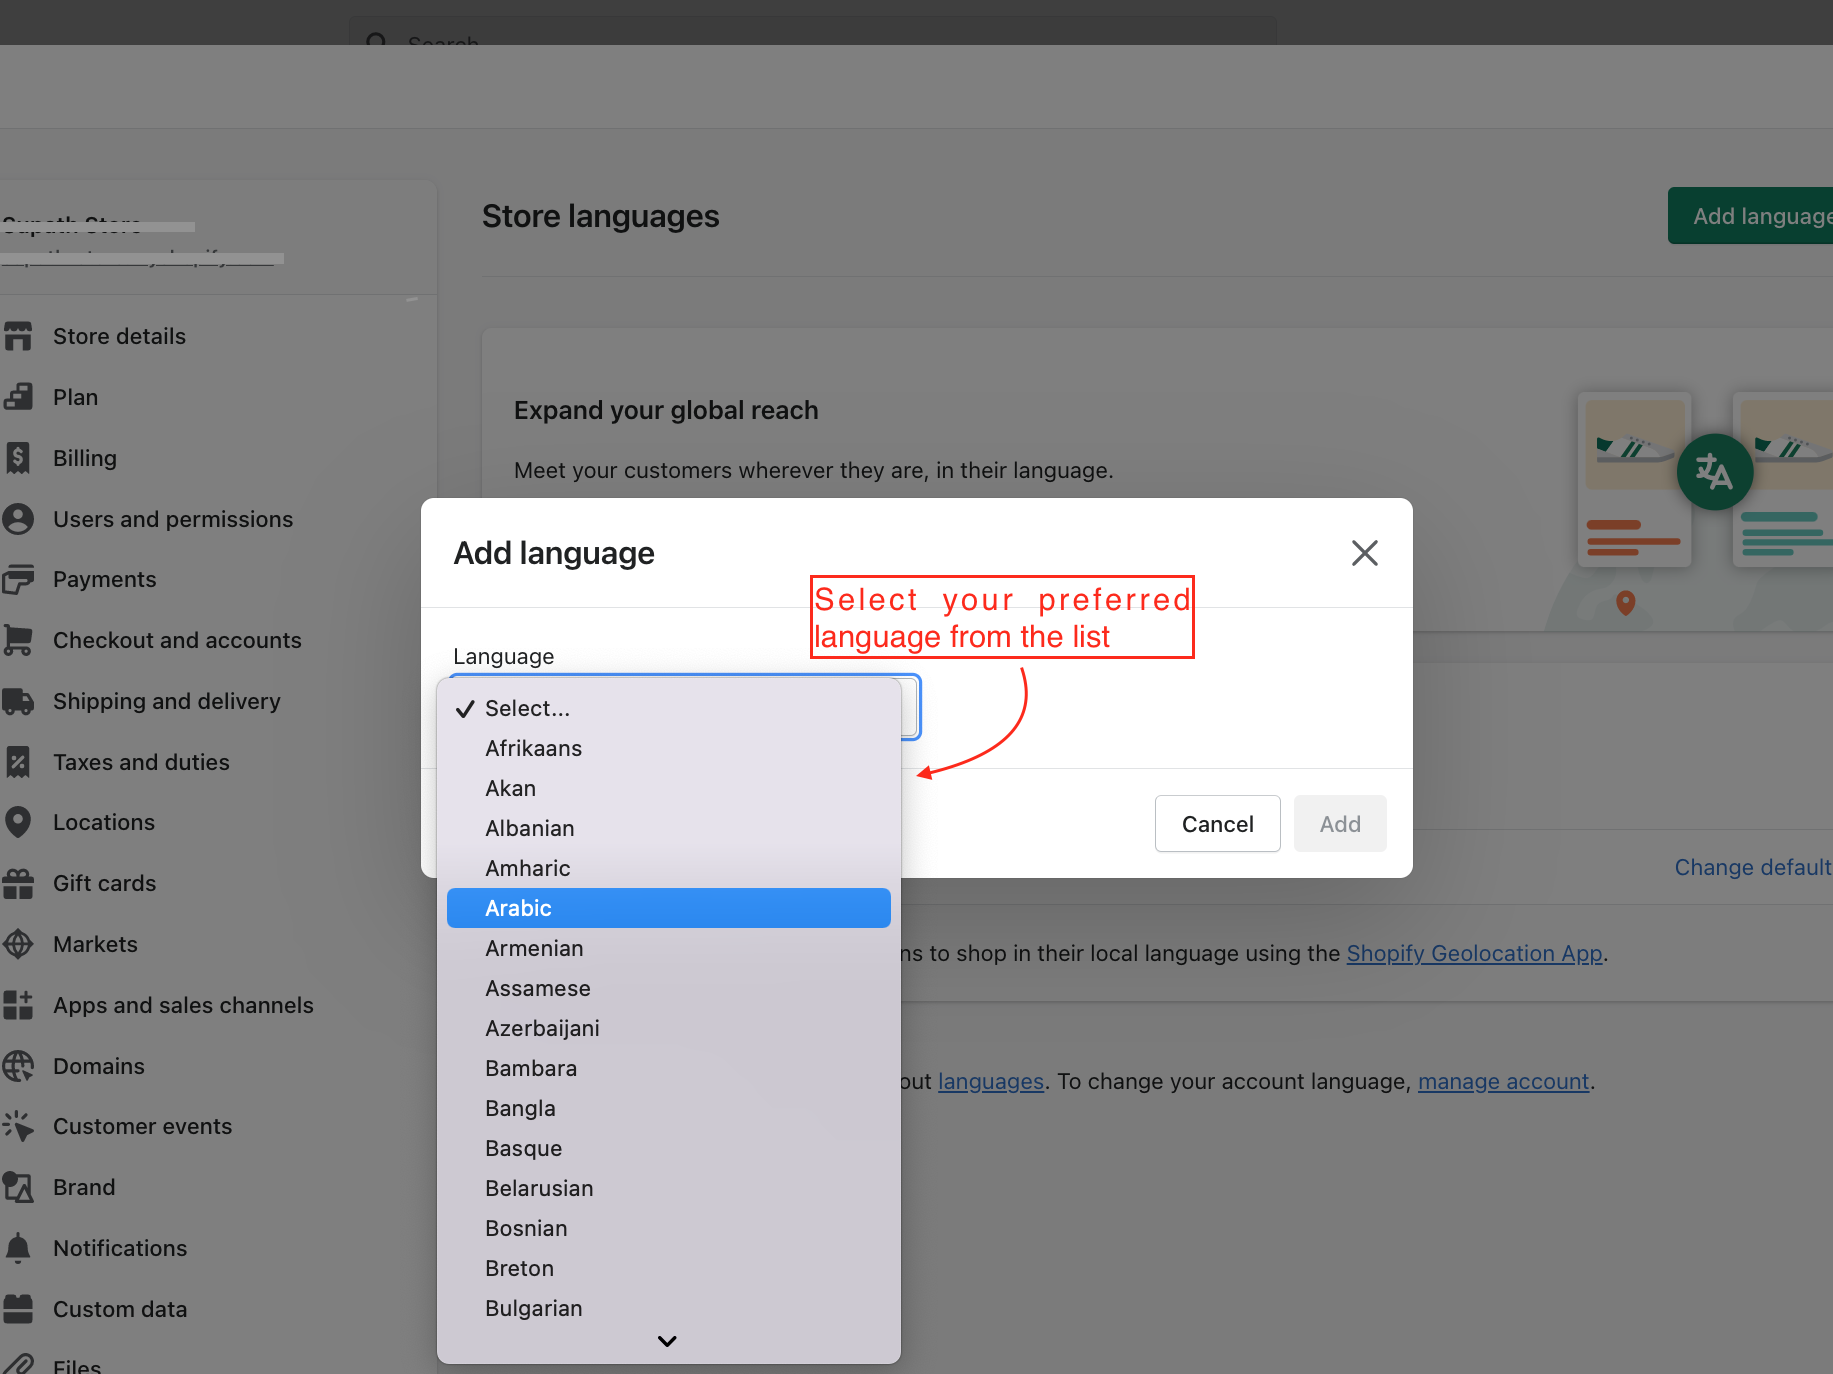
C: Now click Add to add your language to the Shopify language list ⬇
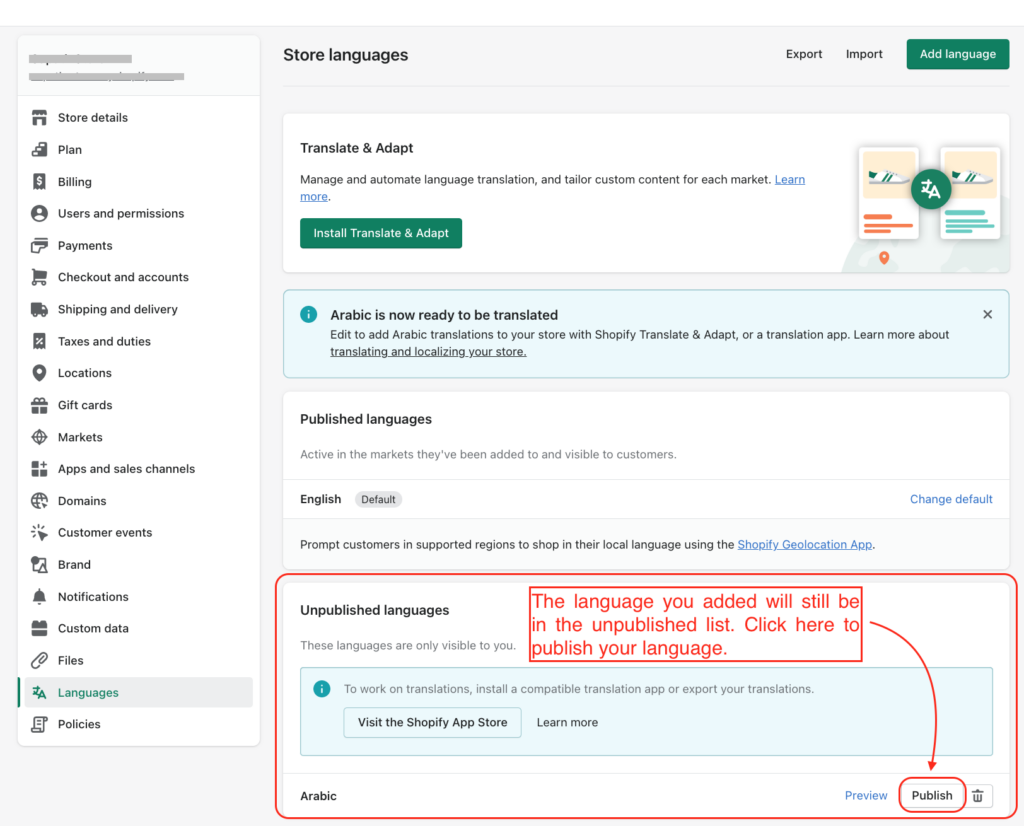
D: Language you’ve added will still be in the unpublished list. Click ‘Publish ‘to publish your newly added language to the Shopify ⬇
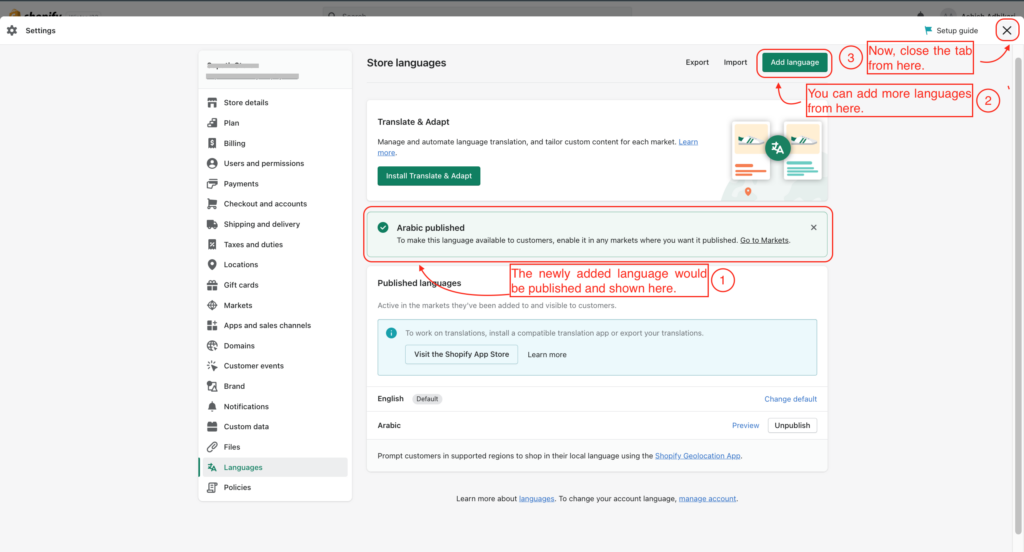
E: Close the Settings page.
- You will get notified that your language is published.
- You can add more languages from Add language button (if any).
- Now close ❌ the Shopify settings page.
Step 4: Translation
A: Now you will be redirected back to the Evlop’s Translation page.
- Click on Language dropdown.
- Select the language you want to translate.
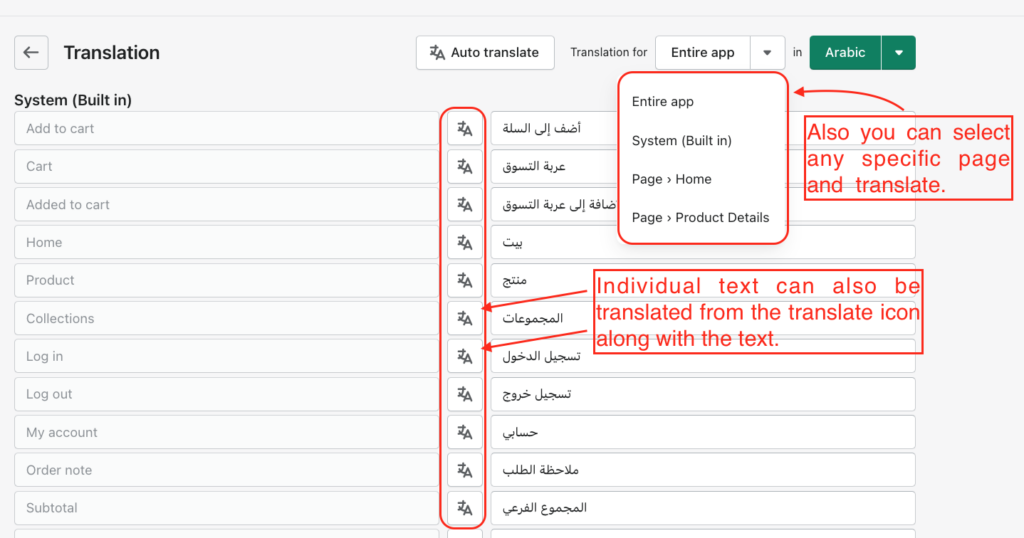
- Select Entire app (Recommended) under Translation for.
- Click on Auto Translate.
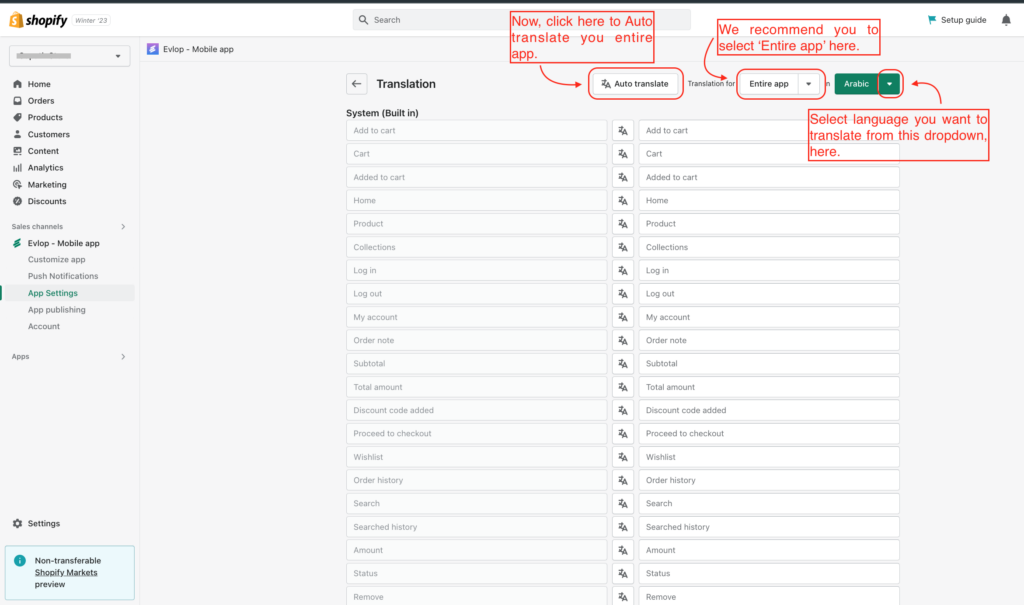
B: Your entire app contents would be translated to the language you selected.
Save the changes.

C: Translation can be manually edited if required.
- Do check the auto translated content thoroughly (Recommended).
- Change the translation manually if any changes are needed to fully meet the language localization requirement.
- Save the changes

D: Individual Text or pages can also be translated separately.
- Individual text can be translated using the Translation icon in between the original content and translated content.
- different pages can also be translated by selecting separate pages from Translation for section.
- Save the changes.